Support our educational content for free when you purchase through links on our site. Learn more
🧼 15-Step Fish Tank Cleaning & Maintenance Guide (2026)
Ever stared into your aquarium, only to see a murky, algae-choked window instead of a crystal-clear portal to an underwater world? You’re not alone. At Aquarium Music™, we’ve seen even the most seasoned aquarists panic when their vibrant tanks turn into green soups overnight. But here’s the secret: a thriving ecosystem isn’t about scrubing until your arms ache; it’s about understanding the delicate symphony of biology, chemistry, and physics that keeps your fined friends happy. In fact, did you know that over-cleaning your filter is one of the fastest ways to crash your entire nitrogen cycle, turning a paradise into a toxic wasteland in mere days?
In this comprehensive guide, we’re pulling back the curtain on the 15 essential steps that separate a struggling tank from a show-stopping masterpiece. We’ll dive deep into the art of gravel vacuuming without disturbing your substrate, the critical “do-not-touch” zones in your filter, and the specific techniques to banish stubborn Black Beard Algae once and for all. Whether you’re managing a simple freshwater bowl or a high-tech planted aquascape, our proven methods will transform your maintenance routine from a chore into a satisfying ritual. By the end of this article, you’ll know exactly why Aqua Shack’s advice to “scrape before you siphon” is a game-changer and how to keep your water parameters stable without breaking the bank.
Ready to turn your tank into a symphony of life? Let’s get cleaning!
Key Takeaways
- Consistency Over Intensity: Regular, smaller water changes (25-30% weekly) are far more effective and less stressful for fish than infrequent, massive overhauls.
- Protect Your Bacteria: Never rinse filter media with tap water; always use old tank water to preserve the beneficial bacteria essential for the nitrogen cycle.
- Scrape Before You Siphon: Always remove algae from glass and decor first so that the dislodged spores can be vacuumed out during your water change.
- Monitor, Don’t Guess: Test water parameters regularly to catch ammonia or nitrate spikes before they become visible problems.
- Plants Are Your Allies: In planted tanks, healthy aquatic plants consume nitrates, naturally reducing the frequency of water changes needed.
Table of Contents
- ⚡️ Quick Tips and Facts
- 📜 A Brief History of Aquarium Hygiene: From Roman Jars to Modern Filters
- 🧰 The Ultimate Fish Tank Cleaning and Maintenance Checklist: 15 Essential Steps
- 1. Testing Water Parameters Before You Start
- 2. The Art of Gravel Vacuuming Without Disturbing the Substrate
- 3. Glass and Acrylic Scrubing: Algae Removal Techniques
- 4. Filter Maintenance: When to Rinse and When to Replace
- 5. Water Change Protocols: Frequency and Volume
- 6. Pruning and Trimming Live Plants for Optimal Growth
- 7. Cleaning Decorations and Hardscape Safely
- 8. Checking Equipment: Heaters, Pumps, and Lights
- 9. Feding Adjustments During Maintenance Cycles
- 10. Monitoring Fish Behavior Post-Cleaning
- 1. Managing Nitrate and Phosphate Levels
- 12. Dealing with Cyanobacteria and Black Beard Algae
- 13. Seasonal Maintenance Adjustments for Different Climates
- 14. Emergency Cleaning: What to Do When the Tank Crashes
- 15. Long-Term Record Keeping for Tank Health
- 🌿 Planted Tank Maintenance: Special Considerations for Aquascapes
- 🐠 Freshwater vs. Saltwater: How Cleaning Routines Differ
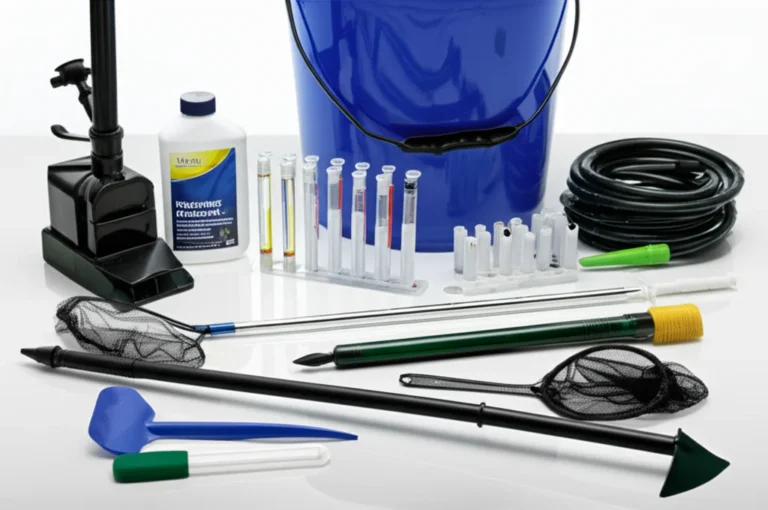
- 🛠️ Top Tools and Products for Effortless Aquarium Care
- 🚫 Common Mistakes That Ruin Your Water Quality
- 🧪 Understanding the Nitrogen Cycle: The Backbone of Tank Hygiene
- 💡 Troubleshooting: Algae Bloms, Cloudy Water, and Smelly Tanks
- 📅 Creating a Sustainable Weekly and Monthly Maintenance Schedule
- 🏆 Conclusion
- 🔗 Recommended Links
- ❓ FAQ
- 📚 Reference Links
⚡️ Quick Tips and Facts
Welcome, fellow aquarists, to the exhilarating (and sometimes slightly soggy) world of fish tank
cleaning and maintenance! At Aquarium Music™, we believe that a thriving aquatic ecosystem is a symphony, and keeping it clean is your maestro’s touch. Before we dive deep, here are some quick, splashy facts to get your fins wet
:
-
Consistency is Key! 🔑 Regular, smaller maintenance tasks are far better than infrequent, massive overhauls. Think of it like brushing your teeth versus a yearly dental deep-clean – daily care prevents major issues!
A consistent weekly routine can make maintenance enjoyable and simpler, often taking around 30 minutes for a well-balanced tank. -
Don’t Remove Your Fish! 🐠 This is a
golden rule. Removing fish for cleaning causes immense stress and can lead to illness or even death. Clean around them; they’re resilient! -
Beneficial Bacteria are Your Best Friends!
🦠 Your filter media houses the crucial beneficial bacteria that process toxic waste. Never rinse filter media with unconditioned tap water or replace it entirely unless absolutely necessary. This can crash your entire nitrogen cycle! -
Algae First, Water Change Second! 🌿 When tackling algae, always scrub it off the surfaces before performing your water change. This suspends the algae spores in the water column, allowing your siphon to suck them right
out! -
Water Changes Aren’t Just for Cleaning! 💧 They replenish essential minerals, reduce nitrates, and keep your water parameters stable. Aim for a 25-30%
water change weekly for most tanks. -
Temperature Matters! 🔥 When adding new water, ensure it’s temperature-acclimated to prevent shocking your aquatic inhabitants.
Turn Off Equipment!** 🔌 Always unplug heaters and filters during water changes to prevent the heater from burning out (it needs to be submerged) and to stop the filter from running dry or sucking in air.
Ready to transform your aquarium from a murky pond into a crystal-clear paradise? Let’s dive in! By the way, if you’re just starting out and wondering about the perfect home for your finned friends, check out our guide on
🐠 10 Fish Tank Sizes & Shapes: The Ultimate 2026 Guide.
📜 A Brief History of Aquarium Hygiene: From Roman Jars to Modern Filters

Ever wonder how our aquatic ancestors kept their
fishy friends happy and healthy? The journey of aquarium hygiene is a fascinating one, mirroring humanity’s evolving understanding of aquatic ecosystems. It wasn’t always about fancy filters and precise water parameters!
Our story begins not with glass tanks
, but with simple, often unadorned, vessels. The ancient Romans, for instance, kept marine fish in marble tanks, primarily for food and display, but their understanding of water quality was rudimentary at best. They relied on frequent
water changes and the sheer volume of water to dilute waste, a practice that, while effective to a degree, was labor-intensive and limited in scope. Fast forward to the 17th and 18th centuries, and the
rise of glass manufacturing brought us closer to the modern aquarium. However, these early “aquariums” were often more like large glass bowls, still lacking any sophisticated filtration. The concept of a balanced ecosystem, where plants and animals could coexist in
a self-sustaining manner, was still a scientific frontier.
The true revolution in aquarium hygiene arrived with the understanding of the nitrogen cycle – a biological process we’ll explore in depth later. In the mid-19th century, natural
ists like Philip Henry Gosse, often credited with popularizing the term “aquarium,” began experimenting with balanced aquariums, recognizing the role of plants in oxygenating water and absorbing waste. Yet, mechanical filtration as we know it was still decades
away. Early filters were often rudimentary, relying on layers of sand and gravel to physically trap debris.
It wasn’t until the 20th century that modern aquarium equipment truly began to take shape. The invention of the air pump, followed
by sponge filters, hang-on-back (HOB) filters, canister filters, and eventually sumps and refugiums for saltwater systems, transformed aquarium maintenance. These innovations allowed aquarists to maintain much cleaner, more stable environments, supporting
a wider variety of aquatic life. Today, we stand on the shoulders of these pioneers, armed with advanced technology and a deep scientific understanding to create miniature aquatic worlds that are not just beautiful, but biologically robust. It’s a testament to how
far we’ve come from simple Roman jars!
🧰 The Ultimate Fish Tank
Cleaning and Maintenance Checklist: 15 Essential Steps
Alright, let’s get down to brass tacks! This isn’t just about scrubbing away gunk; it’s about understanding the delicate balance of your aquatic world and becoming
a true steward of its health. We’ve compiled a comprehensive, 15-step checklist, drawing from our years of experience and incorporating the best advice from fellow aquarists and experts. Get ready to roll up your sleeves (metaphorically, of course, unless you want to get wet!).
1. Testing Water Parameters Before You Start
Before you even think about dipping a hand into your tank, you need to know what you’re dealing
with. Water testing is your diagnostic tool, revealing the invisible health of your aquarium.
Why it’s Crucial: Knowing your baseline parameters helps you identify problems before they escalate and allows you to track the effectiveness of your maintenance routine
. Are your nitrates creeping up? Is your pH stable? These tests tell the story.
What to Test For (and Why):
- Ammonia (NH₃/NH₄⁺): Highly toxic to fish. Should always
be 0 ppm in an established tank. - Nitrite (NO₂⁻): Also very toxic. Should always be 0 ppm.
- Nitrate (NO₃⁻): Less toxic than ammonia or
nitrite, but high levels (above 20-40 ppm for most tanks) indicate a need for a water change. Plants consume nitrates! - pH: Measures acidity/alkalinity. Different fish species require different
pH ranges. Stability is often more important than a specific number. - GH (General Hardness): Measures dissolved calcium and magnesium. Important for osmotic regulation in fish.
- KH (Carbonate Hardness/Alkalinity): Buffers pH, preventing drastic swings. Crucial for stability.
- Temperature: Essential for fish metabolism and overall health.
Recommended Test Kits:
We highly recommend liquid test kits over test strips for accuracy.
Our go-to is the API Freshwater Master Test Kit. It’s comprehensive, reliable, and a staple in any serious aquarist’s arsenal. For saltwater, the Salifert Profi Test Kits are exceptional for their
precision.
👉 CHECK PRICE on:
- API Freshwater Master Test Kit: Amazon | Chewy | Petco
- Salifert Profi Test Kits: Amazon | Bulk Reef Supply | Marine Depot
Our Anecdote: “I once
skipped testing for a few weeks, thinking my tank was ‘stable.’ Boy, was I wrong! My nitrates had shot through the roof, and my usually vibrant tetras were looking lethargic. A quick test revealed the problem, and a larger
water change saved the day. Never again will I underestimate the power of a good test kit!”
2. The Art of Gravel Vacuuming Without Disturbing the Substrate
Gravel vacuuming is more than just sucking up debris
; it’s a delicate dance between cleanliness and preserving your substrate’s integrity. Detritus, that lovely term for “natural waste material that is left after something has been used or broken up,” builds up in your substrate
, releasing nitrates and phosphates. We want that out!
Tools of the Trade: A good gravel vacuum/siphon is indispensable. Brands like Python No Spill Clean and Fill are game-changers for larger tanks, connecting
directly to your faucet for effortless water removal and refilling. For smaller tanks, a simple Aqueon Aquarium Siphon Vacuum works wonders.
The Technique:
- Initiate the Flow: Submerge the wide
end of the gravel vacuum into the tank and the hose end into a bucket (or connect it to your Python system). Use the priming mechanism (or a quick suck if you’re brave!) to start the siphon. - Gent
le Digging: For gravel, gently push the wide tube into the substrate, allowing the lighter detritus to be sucked up while the heavier gravel falls back down. Work in sections, covering about 1/3 to 1/2
of your substrate during each weekly cleaning to avoid disturbing too much beneficial bacteria. - Sand Savvy: If you have a sand substrate, be more cautious. Hover the vacuum just above the sand, allowing the detritus to be
pulled up without sucking up too much sand. The video we watched (and highly recommend checking out at #featured-video) emphasizes this, warning that sand can clog drains if you’re not careful! - Targeted Cleaning: Focus on areas where food often collects, like under decorations or near feeding spots.
Our Tip: Don’t try to get every single speck of detritus in one go. A
little bit left behind won’t harm anything, and over-cleaning can be more detrimental than beneficial.
👉 Shop Gravel Vacuums on:
- Python No Spill Clean and Fill: Amazon | Chewy | Petco
- Aqueon Aquarium Siphon Vacuum: Amazon | PetSmart
3. Glass and Acrylic Scrubbing: Algae Removal Techniques
Ah, algae! The bane of many an aquarist’s existence, yet a natural part of any
aquatic ecosystem. The key is to control it, not eradicate it entirely. And remember the golden rule from Aqua Shack: “Don’t do a water change before you scrap all the algae. And that’s because you want to suck
out as many algae spores as possible.” The video also reiterates this, suggesting scrubbing algae gets it into the water, which will then be removed during the water change.
Tools for
the Job:
-
Algae Scrapers: For glass tanks, a blade scraper like the Flipper Platinum Magnetic Aquarium Algae Cleaner is incredibly effective. For acrylic, which scratches easily, stick to plastic blade scrapers or specialized
acrylic-safe pads like the Mag-Float Floating Aquarium Cleaner. -
Magnetic Cleaners: Brands like Mag-Float are fantastic for daily or weekly touch-ups without getting your hands wet. Just glide it across the glass!
-
Sponges/Brushes: A simple, clean aquarium-specific sponge or a large brush (as recommended by Aqua Shack for larger tanks) works wonders for general scrubbing. For tight spots
or nano tanks, an old toothbrush is surprisingly effective. -
Old Credit Card: Aqua Shack suggests using an old credit card to scrape algae close to the substrate due to its sharp edge.
Techniques for Sparkling Surfaces:
- Start with the Walls: Use your chosen scraper or magnet to remove algae from all visible surfaces. Be thorough but gentle, especially near the substrate line.
Don’t Forget the Corners: Algae loves to hide in crevices. Use a smaller tool or your hand with a scrubbing pad to reach these tricky spots.
3. Decoration Detail: If your decorations have algae buildup
, you can gently scrub them inside the tank with an aquarium-safe brush or sponge. For stubborn algae, you might need to remove them and scrub them in old tank water (never tap water!). The video also suggests manually cleaning decorations and
rocks, often without removing them.
4. Floating Algae: As you scrub, you’ll notice algae floating in the water. This is exactly what we want! It will be removed during the subsequent
water change.
Our Pro Tip: Deal with algae as soon as you see it. Small patches are easy to remove; a full-blown bloom is a battle! If you’re struggling with persistent algae, you might need to investigate the
root cause, which often involves lighting duration, nutrient levels, or even the type of light you’re using. Check out our Aquascaping and Aquatic Plants section for more insights into balancing your planted tank to minimize algae.
👉 Shop Algae Cleaners on:
- Flipper Platinum Magnetic Aquarium Algae Cleaner: Amazon | Bulk Reef Supply
- Mag-Float Floating Aquarium Cleaner: Amazon | Petco
4. Filter Maintenance: When to Rinse and When to Replace
Your filter is the unsung hero of your aquarium, tirelessly working to keep the water clean and clear. But it’s also the heart of your biological filtration,
home to armies of beneficial bacteria. This is where many new aquarists make critical mistakes!
The Golden Rule (and a stern warning!): “Do not clean filter media with tap water or replace it with a new cartridge,
as this kills beneficial bacteria.” The video echoes this sentiment, stating, “Your entire established cycle… what holds this entire aquarium together… is in the hands of this filter pad. A lot of people don’
t understand this. And if you over-clean it, you’re going to completely destroy your cycle.” This is not just advice; it’s a foundational principle of fishkeeping!
How to Properly
Clean Your Filter Media:
- Unplug First! Always, always unplug your filter before touching it. This prevents damage to the impeller and avoids electrical hazards.
- Use
Old Tank Water: This is paramount. When performing your water change, save a bucket of the old tank water. This water is free of chlorine and chloramines that would decimate your beneficial bacteria. - Gentle Rinse: Remove
your filter media (sponges, ceramic rings, bio-balls). Gently swish and squeeze them in the bucket of old tank water to dislodge accumulated detritus. The goal is to remove the physical gunk, not sterilize the media
. A quick rinse ensures beneficial bacteria aren’t entirely removed. - Filter Cartridges: If you use disposable filter cartridges (common in HOB filters), resist the urge to replace them weekly
. Rinse them gently in old tank water. Replace them only when they are literally falling apart or severely clogged, and even then, consider staggering replacements or running the new cartridge alongside the old for a week or two to allow bacteria to colonize.
The video suggests a light rinse once every six months is usually sufficient and not to replace unless absolutely necessary. - Impeller Cleaning: Periodically, clean the impeller and its housing. Detritus can build up
here, reducing filter efficiency. Use a small brush (like a pipe cleaner or an old toothbrush) to get into tight spots.
When to Replace (and How):
Only replace filter media when it’s physically degraded or completely
clogged beyond cleaning. Even then, replace only a portion at a time (e.g., one sponge in a multi-stage filter) to maintain a bacterial colony. If you must replace all media, consider using a bacterial supplement like Seachem
Stability or Fluval Cycle to kickstart the nitrogen cycle.
Our Anecdote: “Early in my aquascaping journey, I made the classic mistake of rinsing my filter sponges under the tap. Within days
, my tank went cloudy, and my fish were gasping at the surface. It was a full-blown ammonia spike! It took weeks to recover, and I learned a painful but invaluable lesson about those invisible bacterial heroes.”
Shop
Filter Media and Supplements on:
- Fluval Foam Filter Media: Amazon | PetSmart
- Se
achem Stability: Amazon | Chewy - Fluval Cycle Biological Enhancer: Amazon | Petco
5. Water Change Protocols: Frequency and Volume
Water changes are the single most impactful maintenance task you can perform for your aquarium’s health. They dilute
nitrates, replenish trace elements, and remove accumulated organic pollutants that even the best filter can’t handle.
How Much and How Often?
The general consensus, supported by Aqua Shack, is a 30-50
% water change once per week for a healthy, well-balanced ecosystem. However, the video suggests removing no more than ~30% of the aquarium water at a time to avoid shocking the fish.
Resolving the Conflict: We at Aquarium Music™ recommend starting with a 25-30% weekly water change for most established tanks. If your nitrate levels are consistently high (above 20 ppm), or if you have a heavily stocked tank, you might increase to 40-50%. For severe issues, Aqua Shack notes that up to an 80% water change may be required, but this should be a rare, emergency measure, not a routine! The key is consistency and monitoring your water parameters.
Step-by-Step Water Change:
- Prepare Your Water:
- Dechlor
inate: If you’re on city water, you must use a dechlorinator like Seachem Prime or API Tap Water Conditioner before adding the new water. This neutralizes chlorine and chloramines, which
are lethal to fish and beneficial bacteria. - Temperature Match: Crucially, ensure your new water is temperature-acclimated to your tank’s water, especially for heated tanks, to prevent shocking
your fish.
- Siphon Out Old Water: Use your gravel vacuum to remove the desired volume of water while simultaneously cleaning your substrate. Remember to save a bucket for filter cleaning!
- **
Add New Water Gently:** Pour the new, conditioned, temperature-matched water back into the tank slowly. Avoid dumping it directly onto your fish or disturbing the substrate too much, which can unroot plants or cause murkiness.
- Dispersion Methods: Aqua Shack suggests pouring onto a hardscape feature, or using a plastic bag, Saran wrap, or Styrofoam to disperse the flow. These are
excellent tips!
- Recheck Equipment: Once the water level is restored, plug your heater and filter back in.
Our Tip: For larger tanks, a Python No Spill Clean and Fill system (mentioned earlier) is a lifesaaver, connecting directly to your faucet for seamless water changes. It truly makes the process “smart” and easy.
👉 Shop Water Conditioners on:
6. Pruning and Trimming Live Plants for Optimal Growth
For those of us who adore planted tanks, pruning isn’t just about aesthetics; it’s vital for plant health and light distribution. Think
of it as giving your aquatic garden a much-needed haircut! This is a key aspect of Aquascaping and Aquatic Plants.
Why Prune?
- Promotes Bushier Growth: Trimming stem plants encourages side shoots, leading to a denser, more lush appearance.
- Prevents Shading: Overgrown plants can block
light from reaching smaller plants below, stunting their growth. - Removes Dying Foliage: Dead or decaying leaves can contribute to organic waste and nutrient spikes.
- Maintains Aquascape Design: Keeps your carefully
crafted layout in shape.
Tools You’ll Need:
A good set of aquascaping scissors (straight and curved) and tweezers are essential. Brands like ADA (Aqua Design Amano) or **
Fluval** offer excellent quality tools.
Pruning Techniques:
- Stem Plants: Cut the stem just above a leaf node. You can often replant the trimmed tops to propagate new plants!
- Foreground
Plants: Trim carpeting plants to prevent them from becoming too dense and blocking light or flow. - Rosette Plants (e.g., Swords, Crypts): Remove older, outer leaves at the base.
- Moss
es: Trim regularly to prevent them from becoming too thick and trapping detritus.
Our Tip: Always remove any trimmed plant matter from the tank to prevent it from decaying and fouling the water.
👉 Shop Aquascaping Tools
on:
- Fluval Aquascaping Tool Kit: Amazon | PetSmart
- ADA Pro-Scissors Wave: Aqua Forest Aquarium (Official Website)
- Cleaning Decorations and Hardscape Safely
Your aquarium decorations and hardscape (rocks, driftwood) add character and provide hiding spots for your fish. However, they can also accumulate algae and detritus.
The Safe Way
to Clean:
-
In-Tank Scrubbing: For light algae or detritus, a gentle scrub with an aquarium-safe brush or sponge (the same ones you use for glass) while the decorations are still in the tank is
often sufficient. The video mentions manually cleaning decorations and rocks without removing them. -
Removal for Deeper Cleaning: If decorations are heavily fouled, carefully remove them from the tank.
-
Use
Old Tank Water: Just like filter media, never use tap water or harsh chemicals on your decorations. Scrub them in a bucket of old tank water to remove algae and gunk. -
Stubborn Algae:
For extremely stubborn algae on non-porous decorations (like plastic plants or resin ornaments), a very dilute bleach solution (1 part bleach to 19 parts water) can be used, but this requires extreme caution. After bleaching, soak
the decorations in a strong dechlorinator solution (like Seachem Prime) for several hours, followed by multiple rinses and a sniff test to ensure no bleach odor remains before returning them to the tank. We generally advise against bleach unless absolutely necessary. -
Natural Hardscape: For driftwood and porous rocks, a good scrub with a stiff brush in old tank water is usually enough. Avoid harsh scrubbing that could damage beneficial biofilm.
Our Warning: Be wary of using
any soaps, detergents, or household cleaners. Even trace amounts can be lethal to your fish.
8. Checking Equipment: Heaters, Pumps, and Lights
Your aquarium equipment works tirelessly behind the scenes. Regular checks ensure everything
is functioning optimally and prevent costly breakdowns or, worse, harm to your aquatic inhabitants. This falls under our Aquarium Equipment expertise!
What to
Check:
-
Heater:
-
Functionality: Is the indicator light coming on? Is the water temperature stable (cross-reference with an accurate thermometer)?
-
Placement: Ensure it’s fully
submerged when operating. The video reminds us to turn off heaters during water changes to prevent them from burning out. -
Cracks: Inspect for any cracks in the glass. Replace immediately if found
. -
Filter/Pump:
-
Flow Rate: Is the water flow strong and consistent? Reduced flow can indicate a clogged filter or impeller.
-
Noise: Excessive noise can signal a worn
impeller or air trapped in the system. -
Leaks: Check all tubing and connections for any drips or leaks.
-
Lights:
-
Functionality: Are all LEDs or bulbs working?
-
Timer: Is your light timer set correctly? Consistent light cycles are crucial for plant health and algae control.
-
Cleanliness: Wipe down the light fixture and cover to remove salt creep or water spots that
can reduce light penetration. -
Air Pump/Airstone:
-
Bubbles: Is the airstone producing a steady stream of fine bubbles? Clogged airstones reduce oxygenation.
Hoses:** Check air lines for kinks or cracks.
Our Tip: Keep spare parts for critical equipment like impellers or filter media. A small investment can save you a lot of hassle during an unexpected breakdown.
9. Feeding
Adjustments During Maintenance Cycles
While not a direct cleaning step, how you feed your fish around maintenance can impact water quality.
Considerations:
- Reduced Feeding Before: Some aquarists choose to slightly reduce feeding the day
before or on the day of a major maintenance session. This minimizes waste production while the tank is being disturbed. - No Feeding During: Avoid feeding your fish during the actual cleaning process. The disturbance can stress them, and une
aten food will only add to the organic load. - Resume Normal Feeding: Once maintenance is complete and your fish have settled, you can resume your regular feeding schedule.
Our Philosophy: We believe in feeding high-quality foods
in moderation. Overfeeding is a primary cause of poor water quality and algae issues. For more on proper nutrition, explore our Fish Care and Species Profiles section.
10. Monitoring Fish Behavior Post-Cleaning
After any maintenance, your fish are your most honest indicators of water quality and stress levels.
What to Look For:
- Normal Activity
: Are they swimming freely, interacting, and exhibiting their usual behaviors? - Stress Signs: Rapid gill movement (gasping), clamped fins, hiding excessively, or darting erratically can indicate stress or poor water conditions.
Coloration: Healthy fish typically maintain vibrant colors. Dullness can be a sign of trouble.
- Appetite: Are they eating normally? A loss of appetite is a common symptom of stress or illness.
**
If You Notice Issues:**
Immediately re-test your water parameters. If ammonia or nitrite are present, or if nitrates are exceptionally high, perform a small emergency water change (10-20%) and add a bacterial supplement. Remember
, fish are acclimated to their current water parameters, so sudden drastic changes can shock them.
Our Experience: “I once did a slightly larger water change than usual, and my usually boisterous Ang
elfish started sulking in a corner. A quick re-test showed a slight pH swing. A small, buffered water change and some stress coat helped them bounce back. Always listen to your fish!”
11. Managing Nitrate
and Phosphate Levels
Nitrates and phosphates are the end products of the nitrogen cycle and decomposition, respectively. While nitrates are less toxic than ammonia or nitrite, high levels promote algae growth and can stress fish. Phosphates are a key nutrient for algae.
Strategies for Control:
- Regular Water Changes: This is your primary weapon against high nitrates. As Aqua Shack notes, water changes help remove detritus.
- Live Plants: Aquatic
plants are natural nitrate and phosphate sponges! They absorb these nutrients directly from the water column, outcompeting algae. The video also highlights that aquatic plants consume nitrates, reducing the frequency of water changes. This is why
we love planted tanks! - Reduced Feeding: Less food in means less waste out.
- Appropriate Stocking Levels: An overcrowded tank will inevitably have higher nutrient loads.
- Filter Media: Specialized
filter media like Seachem Purigen or Fluval Clearmax can absorb nitrates, nitrites, and phosphates. - Gravel Vacuuming: Removing detritus from the substrate directly reduces the source of these nutrients.
**
Shop Nutrient Absorbers on:**
- Seachem Purigen: Amazon | Bulk Reef Supply
- Fluval Clearmax: Amazon | Petco
12. Dealing with Cyanobacteria and Black Beard Algae
These aren’t your typical green fuzzy algae! Cyanobacteria (often called “blue-green algae,” though it’s technically bacteria) and Black Beard Algae (BBA) are stubborn foes that require specific strategies.
Cyanobacteria (Blue-Green Algae):
-
Appearance: Slimy, dark green to bluish-green mat
that can cover substrate, plants, and decorations. Often smells earthy or musty. -
Causes: Low nitrates, low oxygen, poor flow, and excess phosphates can contribute.
-
Treatment:
-
Manual Removal
: Siphon out as much as possible during water changes. -
Blackout: A 3-5 day blackout (no lights, cover the tank) can often kill it off. Ensure good aeration during this time.
-
Antibiotics: In severe cases, erythromycin (e.g., Ultralife Blue Green Slime Remover) can be used, but use sparingly as it can impact beneficial bacteria.
Black Beard Algae (BBA):
- Appearance: Tough, dark black/grey/reddish tufts that attach firmly to plant leaves, hardscape, and equipment.
- Causes: Often linked to fluctuating CO2 levels, inconsistent nutrient
dosing, or high organic waste. - Treatment:
- Spot Treatment: Turn off filters, then use a syringe to spot-treat BBA directly with liquid carbon (e.g., Seachem Flourish Excel) or a dilute hydrogen peroxide solution. Let it sit for 10-15 minutes before turning filters back on.
- CO2 Consistency: For planted tanks, ensure stable CO2 injection.
Manual Removal: Physically remove affected leaves or scrub hardscape.
Our Frustration: “BBA is my personal nemesis! I’ve battled it in my high-tech planted tanks more times than I care to admit. The
key for me was always consistent CO2 and spot-treating with liquid carbon. It’s a war of attrition, but you can win!”
👉 Shop Algae Treatment on:
- Ultralife Blue Green Slime
Remover: Amazon | Bulk Reef Supply - Seachem Flourish Excel: Amazon | Chewy
13. Seasonal Maintenance Adjustments for Different Climates
While fish tanks are largely controlled environments, external factors like seasonal temperature swings can subtly impact your maintenance routine.
Considerations:
Summer Heat:
- Overheating Risk: In warmer climates, tank temperatures can rise, stressing fish and reducing oxygen levels. Monitor closely with a thermometer.
- Evaporation: Increased evaporation means more frequent
top-offs with RO/DI water (to avoid mineral buildup) or dechlorinated tap water. - Increased Algae: Higher temperatures and light can sometimes fuel algae growth, potentially requiring more frequent algae scrubbing.
Winter Cold:**
-
Heater Efficiency: Ensure your heater is adequately sized and functioning. Cold ambient temperatures can make heaters work harder.
-
Drafts: Protect tanks from cold drafts, especially during water changes.
-
Reduced Evaporation: Less evaporation might mean fewer top-offs, but still monitor water parameters.
Our Advice: Always keep an accurate thermometer in your tank. For extreme temperature fluctuations, consider a chiller for summer or extra
insulation for winter.
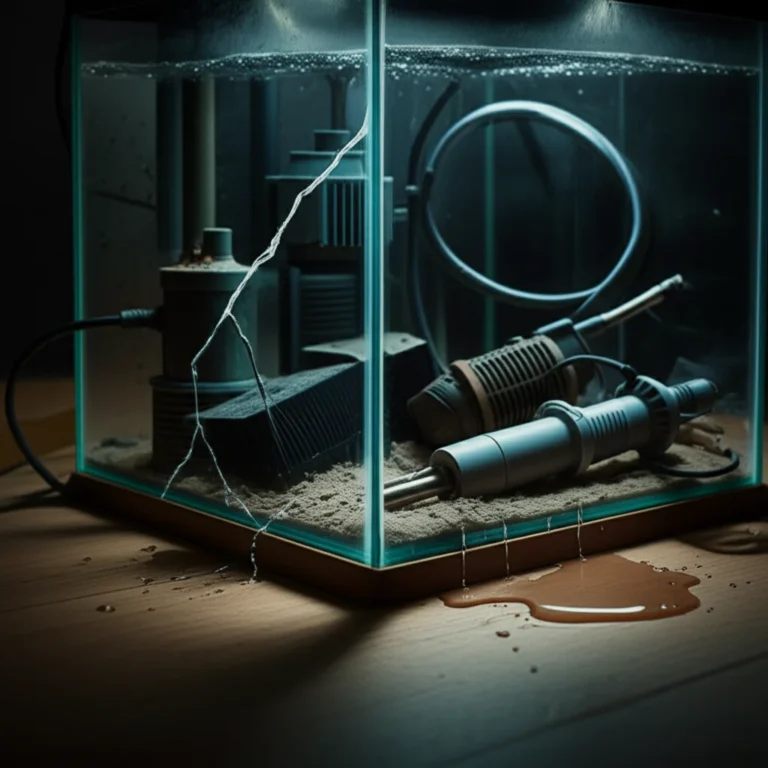
14. Emergency Cleaning: What to Do When the Tank Crashes
A tank crash is every aquarist’s nightmare: sudden cloudy water, gasping fish, and a tell-tale ammonia smell
. It usually signifies a collapse of the nitrogen cycle. Don’t panic! Act swiftly.
Signs of a Crash:
- Cloudy, Milky Water: Often a bacterial bloom.
- Fish Gasping at
Surface: Lack of oxygen or ammonia/nitrite poisoning. - Lethargic or Stressed Fish: Hiding, clamped fins, rapid breathing.
- Strong Odor: Ammonia or rotten egg smell.
High Ammonia/Nitrite Readings: Confirmed by your test kit.
Emergency Protocol:
- Test Water Immediately: Confirm ammonia and nitrite levels.
- Large Water Change (Carefully!): Perform a 50-75% water change using temperature-matched, dechlorinated water. This is one of the few times we recommend such a large change.
- **
Add Dechlorinator/Ammonia Detoxifier:** Use a product like Seachem Prime (which detoxifies ammonia and nitrite temporarily) or API Ammo-Lock. - Boost Beneficial Bacteria: Add a liquid bacterial supplement
(e.g., Seachem Stability, Fluval Cycle) directly to the tank and filter. - Increase Aeration: Add an airstone or increase surface agitation to maximize oxygen exchange.
- Remove
Uneaten Food/Debris: Siphon out any visible decaying matter. - Reduce Feeding: Stop feeding entirely for 24-48 hours, then feed very sparingly.
- Monitor Closely: Re-
test water parameters every 12-24 hours and perform smaller (25%) water changes as needed until ammonia and nitrite return to 0 ppm. - Identify the Cause: Once stable, try to figure out what
caused the crash (overfeeding, filter failure, medication, etc.) to prevent recurrence.
Our Anecdote: “I once had a power outage during a heatwave that lasted for days. When the power came back, my filter
was dead, and the tank was a mess. It was a full-blown crash! I followed these emergency steps, and while I lost a few fish, the majority survived. It taught me the importance of having emergency supplies on hand.”
15. Long-Term Record Keeping for Tank Health
This might sound tedious, but keeping a simple logbook or spreadsheet for your aquarium is a game-changer for long-term health and troubleshooting.
What to Record
:
-
Date of Maintenance:
-
Water Parameters: Ammonia, Nitrite, Nitrate, pH, GH, KH.
-
Water Change Volume: (e.g., “25% water change”)
-
Filter Maintenance: (e.g., “Rinsed filter sponges in old tank water”)
-
Dosing: Any fertilizers, supplements, or medications added.
-
Observations: Any unusual fish
behavior, algae growth, plant melt, or equipment issues. -
Fish Additions/Removals:
Benefits of Record Keeping:
-
Troubleshooting: Helps identify patterns when problems arise. “Ah, my nitrates always
spike after I forget to gravel vacuum for two weeks!” -
Optimizing Routine: Allows you to fine-tune your maintenance schedule based on actual data.
-
Tracking Progress: See how your tank evolves over time.
-
Early Detection: Spot subtle changes before they become major issues.
Our Recommendation: A simple notebook or a Google Sheet works perfectly. Consistency is more important than complexity.
🌿 Planted Tank Maintenance: Special Considerations for Aquascapes
Planted tanks, especially intricate aquascapes, are living works of art. While they share
many maintenance principles with regular fish tanks, their unique demands for light, CO2, and nutrients add a few extra layers of complexity and joy! This is our bread and butter at Aquarium Music™, and it’s why we have a dedicated category
for Aquascaping and Aquatic Plants.
The “Aqua Shack” Perspective: Aqua Shack emphasizes that a well-
balanced planted ecosystem requires minimal maintenance, and a consistent weekly routine of about 30 minutes can make it fun. We couldn’t agree more! When your plants are thriving, they outcompete algae and
contribute significantly to water quality by consuming nitrates. The video also notes that aquatic plants consume nitrates, reducing the frequency of water changes.
Key Differences and Special Considerations:
-
CO2 Management:
-
High-Tech Tanks: If you’re injecting CO2, consistency is paramount. Fluctuations can trigger algae (especially BBA!). Ensure your CO2 system is reliable and your drop checker shows optimal levels.
-
Low-Tech Tanks: Even without injected CO2, ensure good surface agitation for atmospheric CO2 exchange.
-
Fertilization:
-
Macro & Micro Nutrients: Plants need more than just light
. They require macro (Nitrogen, Phosphorus, Potassium) and micro (Iron, Manganese, etc.) nutrients. Dosing liquid fertilizers like Seachem Flourish or API Leaf Zone is often necessary. -
Sub
strate Fertilizers: Root tabs (e.g., Seachem Flourish Tabs, API Root Tabs) are crucial for heavy root feeders like sword plants and crypts. -
Lighting Schedule:
-
Intensity
& Duration: Too much light (intensity or duration) without adequate CO2 and nutrients is a recipe for algae disaster. Find the sweet spot for your plants and stick to it. -
Timers: Use a reliable timer
for consistent light cycles. -
Pruning & Trimming (Revisited):
-
More Frequent: Planted tanks often require more frequent pruning to maintain shape, prevent shading, and encourage bushy growth.
-
Plant-Specific Needs: Understand how each plant species grows and how to prune it effectively.
-
Substrate Disturbance:
-
Less Aggressive Vacuuming: While still important to remove detritus
, be less aggressive with gravel vacuuming in densely planted areas to avoid uprooting plants or disturbing nutrient-rich substrates. -
Root Protection: Be mindful of delicate root systems when working in the substrate.
-
Al
gae Control: -
Nutrient Balance: The best defense against algae in a planted tank is a balanced ecosystem with healthy, thriving plants.
-
Spot Treatments: As mentioned earlier, spot treatments with liquid carbon or hydrogen
peroxide can be effective for localized algae issues like BBA.
Our Philosophy: A truly stunning aquascape is a harmonious blend of art and science. It requires patience, observation, and a willingness to learn from your plants. Don’t be discouraged
by initial challenges; every aquascaper has battled algae or struggled with plant growth. It’s all part of the journey!
👉 Shop Planted Tank Essentials on:
🐠 Freshwater vs. Saltwater: How Cleaning Routines Differ
While the core principles of aquarium hygiene remain
the same – remove waste, maintain water quality, keep fish healthy – the execution can vary significantly between freshwater and saltwater systems. Think of it as the difference between maintaining a serene forest pond and a vibrant coral reef; both beautiful, but with distinct
ecological needs. For more on the specific species, check out our Fish and Aquatic Life section.
Similarities (The Universal Truths):
- Water Changes: Essential for both to dilute nitrates and replenish trace elements.
- Algae Control: Both types of tanks will experience algae, requiring manual removal.
- Filter Maintenance: Cleaning
mechanical filtration (sponges, filter floss) in old tank water is crucial for both. - Equipment Checks: Heaters, pumps, and lights need regular inspection regardless of salinity.
- No Fish Removal: Stress
is universal; leave your finned friends in the tank during cleaning.
Key Differences (Where the Tides Turn):
| Feature | Freshwater Aquarium | Saltwater Aquarium
Water Source: Tap
water (after dechlorination) is fine for freshwater.
Biological Filtration: Primarily relies on bacteria in the filter media and substrate.
Chemical Filtration: Activated carbon is common for removing discoloration and some odors.
Salt
: Not used (unless for specific medicinal purposes).
Evaporation: Replenished with dechlorinated tap water.
Specific Gravity: Not applicable.
Equipment: Simpler setups, typically HOB or canister filters.
Maintenance Frequency: Weekly water changes (25-30%) are standard.
Testing: Ammonia, Nitrite, Nitrate, pH, GH, KH.