Support our educational content for free when you purchase through links on our site. Learn more
12 Unique Ways to Customize Your Fish Tank (2026) 🐠

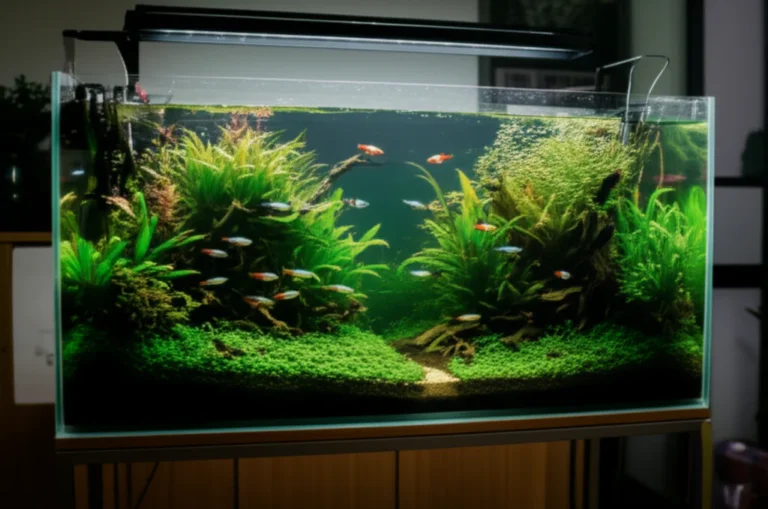
Ever stared at a standard glass box and wondered, “Is this really the best my fish can do?” We’ve all been there. At Aquarium Music™, we believe your aquarium shouldn’t just be a container; it should be a living, breathing masterpiece that reflects your soul. Whether you’re dreaming of a gravity-defying inverted tank, a miniature Roman ruin, or a cyberpunk alleyway, the possibilities are as endless as the ocean itself. In this comprehensive guide, we’re diving deep into 12 unique ideas to transform your tank from ordinary to extraordinary, covering everything from structural builds and hardscape mastery to lighting hacks and fish-first design.
Did you know that a well-designed aquarium can lower human heart rates in under five minutes? That’s right, your custom display isn’t just for the fish; it’s a sanctuary for you, too! But before you start gluing moss to driftwood at 2 a.m. (a habit we all secretly love), you need a plan. We’ll walk you through the science of water chemistry, the art of the “flute” for inverted tanks, and how to avoid the dreaded “just one more thing” syndrome that turns a Zen garden into a cluttered mess. From the vinegar test that saves your shrimp to the 3D printing secrets that create futuristic decor, we’ve got the insider tips you won’t find in basic manuals.
Ready to stop watching fish and start experiencing a symphony of aquatic life? Let’s turn that glass box into a window into another world.
Key Takeaways
- Start with a Theme: Define a clear vision (Iwagumi, Biotope, Fantasy) before buying a single rock to ensure a cohesive and stunning design.
- Safety First: Always test rocks with vinegar and seal 3D prints or clay with aquarium-safe epoxy to prevent toxic leaching and pH crashes.
- Think Beyond the Box: Explore unique shapes like inverted tanks, rimless displays, or integrated furniture stands to create a truly one-of-a-kind centerpiece.
- Fish-First Design: Prioritize the biological needs and natural behaviors of your livestock over pure aesthetics to ensure a healthy, thriving ecosystem.
- Master the Details: Use advanced techniques like the Dry Start Method for carpets, custom lighting spectrums, and strategic negative space to elevate your aquascape.
Table of Contents
- ⚡️ Quick Tips and Facts
- 📜 From Ancient Jars to Modern Masterpieces: A Brief History of Aquarium Customization
- 🎨 Designing Your Aquatic Canvas: Choosing a Theme and Style
- 🏗️ The Ultimate Guide to Custom Aquarium Builds and Structural Modifications
- 🪨 Hardscape Mastery: Selecting and Arranging Rocks, Driftwood, and Substrates
- 🌿 Living Art: Advanced Aquascaping Techniques for Plants and Mosses
- 💡 Lighting and Filtration: Customizing the Invisible Infrastructure
- 🐠 Fish-First Design: Matching Your Livestock to Your Custom Environment
- 🛠️ DIY vs. Pro: When to Build Your Own and When to Call the Experts
- 🚫 Common Customization Mistakes and How to Avoid Them
- 🔧 Maintenance of Personalized Displays: Keeping Your Unique Tank Thriving
- 🏆 12 Unique Ideas You Should Use To Customize Your Fish Tank
- 🧪 The Science of Water Chemistry in Custom Setups
- 📸 Capturing the Beauty: Photography Tips for Your Custom Aquarium
- 🏁 Conclusion
- 🔗 Recommended Links
- ❓ FAQ
- 📚 Reference Links
⚡️ Quick Tips and Facts
Welcome, fellow aquarists and aspiring aquascapers, to the ultimate guide to transforming your fish tank from a mere glass box into a breathtaking aquatic masterpiece! At Aquarium
Music™, we believe your aquarium should be a living, breathing extension of your personality, a tranquil escape, and a vibrant focal point in your home. We’re here to share our deepest insights, battle-tested techniques, and a sprinkle
of our own “aquatic magic” to help you create a unique and beautiful display. Ready to dive into a symphony of aquatic life? Let’s get started! If you’re looking to master every aspect of your tank, don
‘t miss our comprehensive guide on 15 Secrets to Mastering Your Tropical Fish Tank (2026).
Here are some rapid-fire facts and
tips to kick off your customization journey:
- The Golden Ratio isn’t just for art school! Applying the 1:1.618 principle to your hardscape placement can create incredibly natural and pleasing visual balance in
your tank. - Vinegar is your rock’s best friend (or worst enemy)! Always test new rocks with vinegar. If it fizzes, it contains calcium carbonate and will raise your pH, which
is great for Malawi cichlids but potentially lethal for delicate Caridina shrimp. - 3D printing can be aquarium-safe, but with a catch! Only use PLA or **
PETG** filaments, and always seal your prints with a two-part art-resin or epoxy to prevent bacterial films and leaching. - A well-decorated tank can lower human heart rate in under
5 minutes. Talk about stress relief! - Don’t underestimate the power of negative space. These “fish super-highways” are crucial for territorial species to feel comfortable and reduce stress.
- Custom tank stands aren’t just for looks; they’re structural necessities. They must be capable of supporting the immense weight of water, substrate, and decor, often requiring robust materials like 4″ x 2″
timber. - Lighting isn’t just for plant growth; it’s for mood! Adjustable LED lights allow you to customize colors and cycles to enhance fish colors and set the perfect ambiance.
- The “just one more thing” syndrome is real! Once you start customizing, you might find yourself gluing moss to driftwood at 2 a.m. – and loving every minute of it!
📜 From Ancient Jars to Modern Masterpieces: A Brief History of Aquarium Customization

You might think aquarium customization is a modern invention, a hobby born from advanced technology and a desire for aesthetic perfection
. But hold your seahorses! The urge to create miniature aquatic worlds dates back further than you might imagine.
Our journey begins not with sleek glass tanks, but with simple, often crude, vessels. Ancient Egyptians kept sacred fish in ponds
and decorative jars, while Romans experimented with glass bowls for observing marine life. These early attempts were less about “aquascaping” and more about containment and observation. Fast forward to the 18th and 19th centuries, the ”
golden age” of natural history, and the concept of the modern aquarium began to take shape. Early aquarists, often wealthy enthusiasts, would collect exotic fish and plants, arranging them in rudimentary glass-fronted tanks. The focus was still largely
on the specimens themselves, but the idea of creating a visually appealing habitat was slowly bubbling to the surface.
The early 20th century saw a boom in home aquaria, driven by easier access to exotic species and improved filtration.
Yet, customization was still relatively basic – a few plastic plants, some gravel, and maybe a treasure chest that bubbled (we’ve all been there!). It wasn’t until the late 20th and early 21st centuries,
with advancements in filtration, lighting, and plant husbandry, that the art of aquascaping truly exploded. Suddenly, the aquarium wasn’t just a container for fish; it was a living canvas where creativity meets biology.
Today, we stand at the precipice of an aquatic renaissance. From the intricate, minimalist beauty of Iwagumi to the lush, vibrant chaos of the Dutch style, and even the fantastical realms of cyberpunk or Harry Potter-
themed tanks, the possibilities are virtually limitless. We’ve moved beyond simply housing fish to crafting entire underwater ecosystems that tell a story, evoke an emotion, or replicate a specific natural habitat. It’s a testament to human ingenuity and our
enduring fascination with the aquatic world.
🎨 Designing Your Aquatic Canvas: Choosing a Theme and Style
Before you even think about buying a single rock or plant, the first, and arguably most crucial, step in personalizing your fish tank
is to choose a theme and style. This isn’t just about aesthetics; it’s about creating a cohesive vision that guides every decision, from hardscape to livestock. Without a clear direction, your tank can quickly become a jumbled
mess – a fate we wouldn’t wish on our worst algae bloom!
“Your fish tank shouldn’t just be a glass box; it’s a living canvas where creativity meets biology,” as we often say here at Aquarium Music™
. Our goal is to help you balance safety, aesthetics, and fun to create a masterpiece that rivals even professional coral tank projects.
Principles of Aquatic Design: More Than Just Pretty Pictures
Great aquascapes,
much like great art, adhere to certain design principles that create visual harmony and interest. Ignoring these is like trying to compose a symphony without understanding scales – it might sound interesting, but probably not in a good way!
-
The Golden Ratio (1:1.618): This ancient mathematical principle, often found in nature, is a powerful tool for creating natural focal points. Measure your tank’s length, divide by 1.618, and consider placing your main hard
scape element around that point. It creates an asymmetrical balance that’s inherently pleasing to the eye. -
The Rule of Thirds: Imagine dividing your tank into nine equal sections with two horizontal and two
vertical lines. Instead of placing your “hero” rock or driftwood dead center, position it along these lines or at their intersections. This draws the eye and encourages fish to swim “into” open space, preventing a cramped feeling. -
Negative Space: Don’t just fill every inch! Empty areas are just as important as the decorated ones. We like to call them “fish super-highways” 🐠. They provide crucial swimming room, especially for territorial species
like Rams and Apistos, and allow your eye to rest, highlighting the main focal points. -
Layering: This is key to creating depth and a sense of scale. Stagger your plant heights
: tall background plants (like an 18-inch Valisneria), mid-ground plants (such as Cryptocoryne species), and low-growing foreground carpets (like Monte Carlo). This creates a
lush, naturalistic effect that draws the viewer in. For more on plant selection and arrangement, explore our Aquascaping and Aquatic Plants category.
Popular Aquarium Themes and Styles: Find Your Muse!
Now for the fun part – picking your theme! This is where your personality truly shines through.
- Iwagumi (Zen Minimalism) 🧘 ♀️
- Skill Level: ★★★☆
- Key Elements: This Japanese style focuses on a minimalist arrangement of rocks (usually Seiryu Stone) with low-growing carpet plants like Cuba
pearl grass. The arrangement tells a story, often with a main “Oyaishi” (parent stone) and supporting “Fukuishi” and “Suteishi” stones. - Aquarium Music™ Tip: Pair this
serene scape with schooling fish like Cardinal Tetras against a blackwater galaxy theme for a truly meditative display. - Why we love it: It forces you to be deliberate with every placement, creating powerful visual impact with fewer elements.
2
. Dutch Style (Botanical Garden) 🌷
- Skill Level: ★★★★
- Key Elements: Think underwater flower bed! This style emphasizes dense groupings of various stem plants, often with
contrasting colors and textures, to create a “technicolor” look. Hardscape is minimal or entirely absent. Ludwigia ‘Super Red’ is a classic choice for vibrant splashes of color.
Aquarium Music™ Tip: Requires meticulous plant trimming and nutrient dosing to maintain its pristine, manicured appearance. CO2 injection is almost a must.
- Why we love it: It’s a celebration of aquatic flora
, showcasing the incredible diversity and beauty of underwater plants.
- Biotope (Slice of Nature) 🏞️
- Skill Level: ★★★☆
- Key Elements: The goal
here is authenticity – replicating a specific natural habitat from around the world (e.g., an Amazonian blackwater stream, an African rift lake shore). This involves using only materials and species found in that particular environment, such as Catappa leaves
and driftwood for an Amazonian setup. - Aquarium Music™ Tip: Research is paramount! Every detail, from water parameters to fish species, should accurately reflect the chosen biotope.
Why we love it:** It’s an educational and deeply rewarding experience, bringing a genuine piece of the wild into your home.
- Fantasy/Cyberpunk (Unleash Your Imagination) 🚀
Skill Level: ★★★★
- Key Elements: This is where you truly break free from traditional norms!
- Cyberpunk Alley: Use PVC pipe off-cuts spray-painted matte black for futuristic vents. Install
RGB LED pucks under the rim to uplight frosted acrylic “hologram” panels. - Harry Potter Potion Class: Imagine a substrate of Black Diamond blasting sand, sealed Etsy potion bottles
(with silicone/cork) containing poly-resin “smoke,” and perhaps some miniature spellbooks. - Aquarium Music™ Tip: Safety first! Ensure all non-aquatic elements are thoroughly cleaned, sealed with
aquarium-safe epoxy or resin, and won’t leach toxins. - Why we love it: It’s pure, unadulterated fun and allows for incredible storytelling within your tank.
- **
Reef Tank (Marine Masterpiece) 🌊**
-
Skill Level: ★★★★★
-
Key Elements: While often considered a separate category, reef tanks are the epitome of customization. Live rock, diverse
corals, and specialized invertebrates create a vibrant, dynamic ecosystem. -
Aquarium Music™ Tip: Requires advanced knowledge of marine chemistry, specialized equipment, and significant dedication. Not for the faint of heart, but incredibly rewarding.
-
Why we love it: The sheer biodiversity and dazzling colors of a thriving reef tank are unparalleled.
Remember, the best tank isn’t necessarily the most expensive; it’s the one where you stop to watch the fish
for 20 minutes every night. Start with one theme, master the safety protocols, and let the behavior of your fish guide your design choices.
🏗️ The Ultimate
Guide to Custom Aquarium Builds and Structural Modifications
So, you’ve got your theme, your style, and your imagination is running wild. But what if a standard off-the-shelf tank just won’t cut it? What if you dream of
something truly extraordinary, a display that defies convention? This is where custom aquarium builds and structural modifications come into play. This section is for the bold, the adventurous, and those who aren’t afraid to get their hands (and maybe their entire living room) wet!
Beyond the Box: Choosing Unique Tank Shapes and Stands
The shape of your aquarium can dramatically alter its visual impact and how it integrates into your living space. Forget the basic rectangle; there’s a whole world
of possibilities!
- Wall/Furniture Integration: For seamless incorporation, consider arch tanks, double inverted bowfront tanks, radius triangles, or elegant corner bowfront tanks. These shapes are designed to become a part of your home’s architecture
. - Centerpiece Displays: If you want your aquarium to be the undisputed star, showcasing every angle, then double bullnoses, flatbacks, and cylinders are excellent choices. Imagine a towering cylinder tank, a veritable aquatic skyscraper!
- Rimless Aquariums: These minimalist beauties create the illusion that your tank was “plucked right out of the ocean”. They offer
an unobstructed view and a sleek, modern aesthetic.
But a custom tank needs a custom foundation. Your stand isn’t just a piece of furniture; it’s the unseen hero bearing hundreds, if not thousands, of pounds of water
, glass, and rock.
- Design Versatility: Custom stands can be crafted to resemble almost anything – elegant vanities, futuristic tubes, playful Lego bricks, or even integrated into a television console. The
only limit is your imagination (and structural integrity!). - Functional Requirement: Regardless of the design, your stand must be capable of fitting the fish tank, a heater, and a pump, and most importantly, it must be
structurally sound. We’ve seen too many DIY stands buckle under pressure – a disaster waiting to happen. - Robust Construction: For larger custom builds, we often recommend using 4″ x
2″ timber and flooring-grade chipboard for the stand’s framework, with crossbars every 24 inches to prevent distortion. The stand must be perfectly level and capable of being placed 6 inches
away from the wall to allow for wiring, piping, and support.
The Inverted Tank: A Gravity-Defying Spectacle
Now, for something truly mind-bending: the inverted fish tank
. This advanced DIY project, designed for skilled enthusiasts rather than beginners, creates a “display tank unlike any other, where your fish can be displayed in all their beautiful colors with plenty of room to move around”. It’s a showstopper, a conversation starter, and a testament to clever engineering.
The Core Concept:
An inverted tank system consists of a smaller top tank that hangs above a larger base tank. These are connected by a ”
flute” – a water channel that allows water to flow between them while maintaining a vacuum seal. Fish can swim freely between the two levels, often venturing into the inverted top section, seemingly defying gravity!
Structural
Specifications (Drawing from a real-world example):
- Base Unit: A standard 48″ x 18″ x 12″ fish tank often serves as the foundation.
Stand: Custom-built to be 12’3″ long (to accommodate an additional 8′ tank), 18″ front-to-back, and 30″ high. It must be positioned 5″ from the wall for equipment access.
- Top Tank (The Inverted Display): While “almost any size” is possible, a common example uses a **
24″ x 24″ x 1″** top tank. - Glass Specifications:
- 6mm float glass for the sides and top.
- 10mm glass is recommended for the bottom panel, or a laminated composite for extra strength.
- Weight Considerations: Customization is limited by the water’s weight,
supported by the lower tank and frame, and the water depth, which dictates glass thickness. - Bottom Panel Design: Often constructed from multiple pieces to create a recessed shape for enhanced strength.
- Cutting List Example: 1 x 24″ x 6″ back; 2 x 4″ x 5″ front side sections; 2 x 10½” x
3¾” side sections (inside fitting); 1 x 16″ x 5¾” back section (inside fitting).
The “Flute” (The Magic Connection):
This critical
component connects the two tanks, allowing water flow while maintaining the vacuum. Its bottom must be 4 inches below the bottom tank’s water level to prevent catastrophic flooding during water changes.
- Glass
Requirements for Flute (Example): 2 x 15½” x 7½” panels; 2 x 5″ x 7½” panels; 1 x 16″ x 3″ joiner
for the front panel; 1 x 2″ x 1½” stress bar for the front panel.
Assembly: The Delicate Dance of Glass and Silicone
Building a custom tank, especially one with
an inverted section, requires precision, patience, and the right tools.
Materials & Tools:
-
2 tubes of aquarium-safe silicone (Momentive RTV108 is a trusted brand, known to be 10% aquarium-safe)
-
Mastic gun
-
Methylated spirits (for cleaning)
-
Emery paper (for smoothing edges)
-
Masking tape (for holding panels)
-
Sharp knife
-
Spoon with a rounded handle (for smoothing silicone beads)
Step-by-Step Assembly (for the inverted top tank and flute):
- Preparation is
Key: All glass edges must be meticulously cleaned with methylated spirits to remove any grease or residue. This ensures a strong, lasting silicone bond. - Dry Fit First: Before applying any silicone, dry-fit all your
glass panels to ensure they align perfectly. This is your last chance to make adjustments! - Silicone Application: Apply a continuous, even bead of silicone along the edges to be joined. Don’t skimp, but don’t
overdo it either. - Panel Placement & Taping: Carefully press the panels together. Use masking tape to hold them securely in position while the silicone cures.
- Smoothing the Seal: Immediately after assembly
, use the rounded handle of a spoon to smooth the silicone beads into a neat, curved joint. This not only looks professional but also strengthens the seal. - Curing Time: Allow the silicone to cure for at least
24 hours (or as per manufacturer instructions) before proceeding to leak testing. Patience is a virtue here; rushing this step is a recipe for disaster.
Leak Testing and Safety Systems: The Ultimate Stress
Test
You’ve built it, now prove it! Leak testing is non-negotiable, especially for an inverted system where failure can mean a massive flood.
Constructing a Vacuum Pump (for the inverted tank):
A simple vacuum pump is essential for filling and maintaining the inverted section.
- Airtight Container: Use a standard twin-outlet air pump placed inside an airtight container (a take-away container works surprisingly well).
- One-Way Valve: Crucially, incorporate a one-way valve to prevent backflow when the pump is off.
- Airline: Use 6mm airline and appropriate fittings.
**
The Leak Test Method:**
- Submerge and Fill: Place the newly assembled inverted tank right-side up in a large container (like a bathtub) on blocks. Submerge the flute neck
. - Vacuum Fill: Use your vacuum pump and a vacuum wand to slowly fill the top tank. The top tank will hold approximately 2 imperial gallons.
- The 24-
Hour Watch: Maintain the water level 1 inch from the top panel and leave it for 24 hours. This is your safety check to ensure no leaks.
Critical Safety Warning!
If the vacuum fails, all that
water will drop into the bottom tank, increasing its volume by more than 50%, potentially overflowing it onto the floor! This is not a project for the faint of heart or the careless.
**
CHECK PRICE on:**
- Momentive RTV108 Silicone: Amazon | eBay
- Aquarium Air Pump (Twin Outlet): Amazon | Chewy | Petco
- Aquarium One-Way Valve: Amazon | Bulk Reef Supply
🪨 Hardscape
Mastery: Selecting and Arranging Rocks, Driftwood, and Substrates
Ah, hardscape! This is the skeleton of your aquascape, the foundation upon which all other beauty is built. Rocks, driftwood, and substrate aren’t just decorative
; they provide structure, hiding places for fish, surfaces for beneficial bacteria, and can even influence water chemistry. Getting this right is paramount for a thriving, beautiful display. For more detailed guidance on setting up your tank, visit our Aquarium Setup section.
The Rock Solid Truth: Selection and Safety
Choosing the right rocks is more than just picking pretty pebbles. It’s about understanding
their impact on your aquatic environment.
-
The Vinegar Test: Your pH Protector! 🧪
This is a non-negotiable step for any new rock you introduce to your tank. Drip a few drops of white
vinegar onto the rock. If it fizzes or bubbles, it contains calcium carbonate. What does that mean? It will leach minerals into your water, raising your pH and increasing water hardness (GH/KH). -
✅ Good for: African Cichlid tanks (Malawi, Tanganyika) that thrive in hard, alkaline water.
-
❌ Bad for: Blackwater setups, planted tanks, or shrimp species like Caridina,
which require soft, acidic water. -
Aquarium Music™ Anecdote: One of our junior aquascapers once skipped this test, adding some beautiful “river rocks” to a newly set up Caridina shrimp
tank. Within a week, the shrimp were stressed, and the pH was through the roof. Lesson learned the hard way! Always test, test, test! -
Recommended Rock Types:
-
Seiryu Stone: A
classic for Iwagumi and other natural styles. Its jagged, textured surface and blue-grey tones create dramatic landscapes. Generally inert, but some pieces can have minor pH-raising properties, so testing is still wise. -
Dragon
Stone (Ohko Stone): Characterized by its unique, porous, “dragon skin” texture and earthy tones. It’s excellent for creating caves and crevices and is generally inert. -
Lava Rock: Lightweight
, highly porous, and inert. Its rough surface is fantastic for attaching mosses and epiphytic plants. -
Slate: Flat, layered, and inert. Great for creating ledges, caves, or a layered mountain effect.
Driftwood: The Heart of a Natural Aquascape
Driftwood adds incredible natural beauty, provides shelter, and releases beneficial tannins that can create a natural blackwater effect (loved by many fish species!).
- Preparation is Paramount: Never
just toss collected driftwood into your tank!
- Scrub & Boil: Thoroughly scrub the wood to remove any loose bark, dirt, or organic matter. Then, boil it for several hours (or days, for large pieces) to sterilize it and help it become waterlogged. This also helps release some of the initial tannins.
- Soak: After boiling, soak the wood in a separate container, changing the water daily
, until it sinks and the tannins leaching out are at an acceptable level for your desired aesthetic.
- Recommended Driftwood Types:
- Manzanita Wood: Smooth, elegant branches that resist biofilm buildup better than some
other types. Excellent for creating intricate tree-like structures. - Spider Wood (Redmoor Wood): Known for its intricate, root-like branches, perfect for creating dense, naturalistic layouts
. Can release a lot of tannins initially and may grow a white biofilm (harmless, often eaten by snails/shrimp) as it settles. - Malaysian Driftwood: Dense, dark, and sinks readily
. Great for creating solid bases and larger structures.
Stability Hacks: Making Your Hardscape Rock-Solid (Literally!)
Ever had a carefully constructed rock pile collapse during a water change? We have, and it’s not
fun. Here are our pro tips for stability:
- Drill & Sew: For spider wood or other branched pieces, drill small 2mm holes in strategic locations. Thread aquarium-safe cable ties through these
holes and secure them, burying the tie heads in the substrate. This creates invisible, rock-solid mountains that won’t shift. - Silicone Stacking: For rock structures, use a small
dab of aquarium-safe silicone (like Momentive RTV108) between contact points to secure them. Allow ample curing time before filling the tank. - Foundation First: Always place your heaviest hardscape elements directly on
the bottom glass of the tank, before adding substrate. This prevents them from shifting and potentially crushing fish or cracking the tank if the substrate underneath erodes. - Shadow Gaps: When placing stones against the glass, leave
a small 1cm gap. This allows for detritus removal and cleaning without having to dismantle your entire scape.
Substrate: The Unsung Hero Beneath Your Feet
The substrate isn’t just pretty
gravel; it’s a vital component of your aquarium’s ecosystem.
-
Inert Substrates:
-
Pool Filter Sand: Inexpensive, inert, and fine-grained. Great for bottom-dwelling fish like
Corydoras. -
Black Diamond Blasting Sand: A popular choice for its striking dark color, which makes fish colors pop. Inert and relatively inexpensive.
-
Gravel:
Comes in various sizes and colors. Choose smooth, natural gravel to protect delicate fish barbels. -
Nutrient-Rich Substrates (for planted tanks):
-
AquaSoil (e.g., ADA Aqua Soil Amazonia, Controsoil): These specialized substrates are rich in nutrients, buffer the pH to a slightly acidic range, and provide an ideal environment for plant roots. Controsoil is a fantastic option for contest-quality
planted tanks. -
Specialty Substrates:
-
Crushed Coral/Aragonite Sand: Used in marine tanks or African Cichlid tanks to buffer pH and add hardness.
-
Laterite: A clay-based additive that provides iron and other trace elements for plants.
👉 CHECK PRICE on:
ADA Aqua Soil Amazonia:** Amazon | Aqua Forest Aquarium (Official Site)
- Controsoil: Amazon
| Bulk Reef Supply
🌿 Living Art: Advanced Aquascaping Techniques for Plants and Mosses
Once your hardscape is in place, it
‘s time to breathe life into your aquatic canvas with plants and mosses. This is where the “living art” truly begins! Aquascaping with plants is a delicate balance of horticulture, design, and understanding the needs of your aquatic flora
. For an even deeper dive into the world of aquatic plants, check out our Aquascaping and Aquatic Plants section
.
The Green Thumb Guide: Plant Selection and Placement
Choosing the right plants for your custom display is crucial. Consider their growth habits, light requirements, and how they’ll interact with your hardscape and fish.
Layering for Depth: As we discussed in the design section, layering is key.
- Background Plants: Tall, fast-growing stem plants like Rotala rotundifolia, Ludwigia repens, or elegant
Vallisneria spiralis create a lush backdrop and hide equipment. - Mid-ground Plants: Medium-height plants that add texture and color. Cryptocoryne species (like Cryptocoryne wendtii or Cryptocoryne undulata) are fantastic for this, as are smaller sword plants (Echinodorus parviflorus ‘Tropica’).
- **Foreground Plants (Carpets):
** Low-growing plants that create a “lawn” effect. Hemianthus callitrichoides ‘Cuba’ (Dwarf Baby Tears), Eleocharis parvula (Dwarf Hairgrass), and Monte Carlo
are popular choices, though they often require high light and CO2. - Epiphytic Plants: These gems don’t need to be planted in the substrate. They attach to rocks and driftwood, adding instant natural beauty.
Anubias species: (Anubias barteri, Anubias nana) are incredibly hardy, low-light plants with broad, dark green leaves.
- Java Fern (Microsorum pteropus): Another robust, low-light option with delicate, feathery fronds.
- Bucephalandra species: Smaller, often colorful epiphytes that thrive in moderate light.
- Mosses:
The ultimate detailers! - Java Moss (Taxiphyllum barbieri): Versatile and easy to grow, perfect for covering driftwood, rocks, or creating moss walls.
- Christmas Moss (Vesicularia montagnei): Grows in a more structured, Christmas tree-like pattern.
- Fissidens Fontanus (Phoenix Moss): A delicate, feathery moss that creates a stunning, natural look
.
Advanced Aquascaping Techniques: Elevate Your Greenery
Beyond simply planting, these techniques will help you achieve that “wow” factor.
- Moss Ledges on Suction Cups: Want to easily trim your moss without
disturbing your entire scape? Create small “moss ledges” by attaching moss to flat pieces of inert plastic or slate, then secure them to the tank glass with suction cups. When it’s trim time, simply remove the ledge, trim over
a bucket, and reattach! - Dry Start Method (DSM): For carpeting plants, the DSM involves growing them emersed (above water) in a high-humidity environment before flooding
the tank. This allows them to establish a strong root system and spread quickly, often with less algae. It’s a patience game, but the results are spectacular. - CO2 Injection: For lush, vibrant growth, especially with
demanding carpet plants and red stem plants, CO2 injection is a game-changer. It provides plants with the carbon they need for photosynthesis, leading to explosive growth and intense coloration. - Fzone Mini Regulator: A quality
regulator is essential for precise CO2 dosing. Paired with an Atlas Scientific pH Probe, you can even get WhatsApp alerts if your pH dips too low. - Fertilization: Plants need more than just light
and CO2. A comprehensive liquid fertilizer like NilocG Thrive provides essential macro and micronutrients, ensuring your plants remain healthy and vibrant.
The Art of Attachment: Securing Plants and Mosses
Super Glue Gel (Cyanoacrylate): Your best friend for attaching mosses and epiphytes to hardscape. It’s aquarium-safe and cures almost instantly when exposed to water. Just a tiny dab is all you need! *
Be warned: super-glue gels can sometimes leave hazy streaks if used excessively or improperly.*
- Cotton Thread/Fishing Line: For larger moss pads or delicate plants, you can gently tie them to driftwood
or rocks. The thread will eventually degrade, and the moss will attach itself. - Planting with Tweezers: Long, specialized aquascaping tweezers make planting delicate foreground plants much easier, allowing for precise placement without disturbing the substrate.
Aquarium Music™ Anecdote: Our head aquascaper, Leo, once spent an entire weekend meticulously gluing individual strands of Fissidens moss to a intricate piece of spider wood. He swore he developed a new form of meditation
! The result? A breathtaking “bonsai tree” effect that became the centerpiece of one of our showroom tanks. It was worth every cramped finger!
👉 CHECK PRICE on:
- Dwarf Hairgrass (Eleocharis parvula): Amazon | eBay
- Monte Carlo (Micranthemum ‘Monte Carlo’): Amazon | Aquarium Co-Op
- Anubias Nana: Amazon | PetSmart
- Fzone Mini Regulator: Amazon
| Fzone Official Website - NilocG Thrive Fertilizer: Amazon | NilocG Aquatics Official Website
💡
Lighting and Filtration: Customizing the Invisible Infrastructure
You’ve painstakingly chosen your hardscape, meticulously planted your greenery, and even dared to defy gravity with an inverted tank. But without proper lighting and filtration, your aquatic masterpiece will remain a dim
, murky dream. These “invisible infrastructures” are the lifeblood of your custom aquarium, dictating plant growth, fish health, and the overall visual impact. For all your equipment needs, our Aquarium Equipment section is a treasure trove of information.
Illuminating Your World: Customizing Aquarium Lighting
Lighting isn’t just about seeing your fish; it’s about enhancing their colors, promoting
plant growth, and setting the mood. Modern LED technology offers unprecedented customization.
Rating Table: Popular Aquarium LED Lights
| Feature | Twinstar 90E | Fluval Plant 3.0 | DIY 57 |
|---|---|---|---|
| 30 LED Strip | |||
| Design | 9 | 8 | 6 |
| Functionality | 9 | ||
| 10 | 7 | ||
| Plant Growth | 9 | 9 | 7 |
| Color Rendition | 9 | 9 | 6 |
| Ease of Use | 8 | 9 | 5 |
| Smart Features | 5 (No Wi-Fi) | 10 (Wi-Fi RGB) | |
| 4 (Manual) | |||
| Durability | 9 | 8 | 6 |
| Value | 7 | 8 | 9 |
Detailed Analysis of Lighting Options:
- Twinstar 90E:
- Features: Known for its exceptional PAR (Photosynthetically Active Radiation) output (around 120 PAR)
and high CRI (Color Rendering Index) of 92. This means vibrant plant growth and true-to-life fish colors. It’s a favorite among serious planted tank enthusiasts. - Benefits
: Excellent for demanding plants, makes colors pop, sleek design. - Drawbacks: Lacks smart features like Wi-Fi or customizable RGB channels. More of a “set it and forget it” high
-performance light. - Aquarium Music™ Perspective: “If you want pure plant power and stunning clarity, the Twinstar is a workhorse. We’ve seen incredible growth in our high-tech planted displays
with these.”
- Fluval Plant 3.0 LED:
- Features: Offers good PAR (around 90 PAR) and a CRI of 85. Its
standout feature is full Wi-Fi RGB control, allowing for custom color blends, sunrise/sunset modes, and even cloud effects. - Benefits: Highly customizable spectrum, excellent for enhancing specific fish colors, automated lighting cycles, user
-friendly app control. - Drawbacks: Slightly lower PAR than top-tier dedicated plant lights, some users report app connectivity quirks.
- Aquarium Music™ Perspective: “For creative control and dynamic
displays, the Fluval Plant 3.0 is hard to beat. You can literally paint your tank with light, making those reds redder and greens greener. Just make sure your color changes don’t stress out your fish!”
- DIY 5730 LED Strip:
- Features: A budget-friendly option, offering around 70 PAR and 75 CRI. Requires some
assembly and basic electrical knowledge. - Benefits: Highly customizable in terms of length and placement, very cost-effective.
- Drawbacks: Lower light output, requires a heatsink to prevent sagging and ensure
longevity, no integrated smart features. - Aquarium Music™ Perspective: “For the truly adventurous DIYer, these strips offer incredible flexibility. We’ve used them to create unique backlighting effects
and supplemental lighting in custom canopies. Just remember, safety first with electrical components near water!”
Color Temperature and Ambiance:
- 6,500K (Daylight): This color temperature makes greens pop and is
ideal for plant growth. It mimics natural midday sunlight. - 3,000K (Warm White/Amber): Adds a cozy, amber glow. Blending this with cooler temperatures can create beautiful sunrise
/sunset effects. - RGB (Red, Green, Blue): Allows for endless color combinations to highlight specific fish colors or create dramatic moods.
Custom Lighting Hacks:
- Custom Wooden
Canopies: Building a custom wooden canopy allows you to integrate various light fixtures seamlessly, hiding wires and providing a polished look. - Backlighting: Double-paned backings allow for slipping in different backgrounds
. You can also use LED light bars behind these for a stunning backlit effect, creating depth and simulating an “endless aquascape”. - Mounting LED Strips: Mount DIY LED strips on **
aluminum channels** with a small 5V PC fan to prevent sagging and dissipate heat, extending their lifespan.
👉 CHECK PRICE on:
- Twinstar LED Lights: Amazon | Aqua Forest Aquarium (Official Distributor)
- Fluval Plant 3.0 LED: Amazon | Chewy | Fluval Official Website
- 5730 LED Strip Lights: Amazon | eBay
The Unseen Heroes: Customizing Filtration
Filtration is the silent workhorse of your aquarium, keeping the water crystal clear and healthy. Customizing your filtration means optimizing it for your specific
tank size, bioload, and aesthetic.
Types of Filtration:
- Mechanical Filtration: Physically removes particulate matter (fish waste, uneaten food, detritus).
- Media: Sponges
, filter floss, filter socks.
- Biological Filtration: Converts harmful ammonia and nitrites into less harmful nitrates using beneficial bacteria.
- Media: Ceramic rings, bio-balls, pumice, ginger coral (as seen in the featured video [cite: #featured-video]). High surface area is key.
- Chemical Filtration: Removes dissolved organic compounds, odors, and discoloration.
- Media: Activated carbon, pur
igen, specialized resins.
Customizing Your Filter Setup:
- External Canister Filters: Brands like Fluval FX series or Eheim Professional are highly customizable. You can choose and arrange various filter media to suit
your needs. - Aquarium Music™ Tip: For heavy bioloads or large planted tanks, we often run two canister filters in parallel for redundancy and enhanced filtration capacity.
- Featured Video Insight: The creator
in the video uses a PUMP LW-302 external filter, meticulously loading it with ginger coral, pumice, and sponge for comprehensive filtration [cite: #featured-video]. This demonstrates the importance of selecting appropriate media for your
specific setup. - Sump Systems: For larger custom tanks, sumps offer unparalleled customization. They are separate tanks (often hidden in the stand) that house heaters, protein skimmers (for marine), refugiums (for growing beneficial macroalgae), and massive amounts of filter media. They increase water volume and hide unsightly equipment.
- Circulation Pumps: Beyond the main filter, additional powerheads or washing machine pumps (with pipes turned upward for circulation) can create specific flow patterns, preventing dead spots and ensuring even nutrient distribution for plants.
- Smart Gadgets for Monitoring:
- Inkbird Wi-Fi Controller: Can monitor temperature and send you text
alerts if it exceeds a set threshold (e.g., > 76°F). Invaluable for preventing overheating disasters. - Fzone Mini Regulator + Atlas Scientific pH Probe: Allows
for precise CO2 dosing and can send WhatsApp alerts if your pH drops too low, critical for CO2 injected planted tanks.
Aquarium Music™ Anecdote: Our resident tech guru, Sarah, once built a
custom sump for a client’s 300-gallon display that included a dedicated “algae scrubber” section. It was a marvel of engineering, keeping nitrates virtually undetectable and the water pristine, all while being completely hidden from view. The
client loved it, and so did the fish!
👉 CHECK PRICE on:
- Fluval FX Series Canister Filter: Amazon | Chewy | Fluval Official Website
- Eheim Professional Canister Filter: Amazon | Petco | Eheim Official Website
- Inkbird Wi-Fi Temperature Controller: Amazon | Inkbird Official Website
- Atlas Scientific pH Probe: Amazon | Atlas Scientific Official Website
🐠 Fish-First Design: Matching Your Livestock to Your Custom Environment
You’ve poured your heart and soul into crafting a stunning
custom aquarium – the hardscape is perfect, the plants are thriving, and the lighting is dialed in. But what about the stars of the show? The fish! At Aquarium Music™, we firmly believe in fish-first design. This
means selecting fish species that will not only thrive in your custom environment but also enhance its beauty and functionality. For comprehensive information on fish care and species, explore our Fish Care and Species Profiles and Fish and Aquatic Life categories.
Harmony in the Habitat: Choosing Compatible Species
The biggest
mistake a new aquarist can make is falling in love with a fish and then trying to force it into an unsuitable tank. Your custom tank, no matter how beautiful, must meet the specific needs of its inhabitants.
- Water
Parameters: Does your hardscape leach calcium, raising pH and hardness? Then African Cichlids might be a better fit than delicate Discus. Is it a blackwater biotope with low pH? Then Tetras, Rasboras, and
Apistos will flourish. Always match your fish to your water chemistry, not the other way around. - Tank Size and Shape: A custom tall, narrow tank might be perfect for Angelfish or Discus, while a long
, shallow tank suits schooling fish like Danios. Ensure your fish have enough swimming space and appropriate dimensions for their adult size. - Temperament and Compatibility: Research fish compatibility thoroughly. A beautiful custom tank can quickly become a war
zone if aggressive species are mixed with peaceful ones. Consider schooling needs, territoriality, and potential for predation. - Biotope Matching: If you’ve created a specific biotope (e.g., Amazonian, Southeast Asian), populate it with fish naturally found in that region. This enhances the authenticity and often ensures optimal conditions for the fish.
Leveraging Your Custom Design for Fish Behavior
Your unique tank design can actually influence and benefit your fish’s natural
behaviors.
-
Negative Space for Swimmers: Remember those “fish super-highways” we talked about? They’re crucial for active swimmers and territorial species to establish their zones without constant conflict.
-
Hardscape for Hiding and Spawning: Intricate driftwood arrangements and rock caves provide essential hiding spots, reducing stress and offering potential spawning sites. Fish feel more secure when they have places to retreat.
-
Plant
Density for Security: Densely planted areas offer cover for shy fish and fry, making them feel safer and more likely to exhibit natural behaviors. -
The Inverted Tank: A Unique Perspective for Fish!
Believe it or not,
the warm, undisturbed environment of the inverted top tank can be an ideal breeding ground for certain species like Bettas, Gouramis, and Angelfish. The unique, enclosed space can provide a sense of security and
isolation, encouraging spawning behavior. Watching your fish explore this gravity-defying space is truly a sight to behold!
Maintenance Crew: Fish That Help Keep Your Custom Tank Clean
Don’t forget the natural clean-up crew!
Incorporating certain species can help maintain your custom display.
-
Algae Eaters:
-
Otocinclus Catfish: Small, peaceful, and excellent at grazing on soft algae on plants and hardscape.
-
Siamese Algae Eaters (SAE): Good at tackling tougher algae, including some forms of hair algae.
-
Plecos (Suckerfish): While many grow very large, smaller species
like Bristlenose Plecos are fantastic algae eaters and can help clean hard-to-reach areas, especially in complex custom setups. -
Detritus Eaters:
-
Corydoras Cat
fish: Active bottom dwellers that sift through substrate, helping to keep it clean of uneaten food and detritus. -
Snails (Nerite, Ramshorn): Excellent at consuming algae and leftover food.
Aquarium Music™ Anecdote: Our client, Mr. Henderson, had a stunning Iwagumi scape with pristine white sand. He was constantly battling detritus buildup. We recommended a small school of Pygmy Corydoras, and within
weeks, his sand was sparkling! It’s amazing how a few well-chosen fish can make a world of difference.
🛠️ DIY vs. Pro: When to Build Your Own and When to Call the Experts
The
allure of a custom aquarium is undeniable, but the path to achieving it can lead down two distinct roads: the rewarding (and sometimes frustrating) journey of DIY, or the polished, stress-free experience of hiring professionals. At Aquarium Music™, we’ve
seen both triumphs and “oops” moments from both approaches. So, when should you roll up your sleeves, and when is it smarter to dial a pro?
The DIY Dream: Unleash Your Inner Aquascaper
For
many, the joy of creating something with their own hands is a core part of the hobby. DIY customization offers unparalleled freedom and can be incredibly cost-effective.
Benefits of DIY:
- Unrestricted Creativity: You’
re only limited by your imagination (and physics!). Want a tank shaped like a giant boot? Go for it! - Cost Savings: Often significantly cheaper than purchasing custom-made items or hiring professionals.
- Personal Satisfaction
: The pride of looking at a unique display you built yourself is immense. - Learning Experience: You’ll gain invaluable knowledge about materials, construction, and aquatic science.
Drawbacks of DIY:
Time and Effort:** Custom builds are time-consuming and require significant effort.
- Skill and Tools Required: Projects like the inverted tank require specific skills (glass cutting, silicone application) and tools.
Risk of Failure: Mistakes can be costly, leading to leaks, tank damage, or harm to aquatic life. “If the vacuum fails, all that water will drop into the bottom tank, overflowing it onto the floor!”
- Warranty/Support: No professional warranty if something goes wrong.
DIY Innovations: Getting Creative (Safely!)
The DIY community constantly pushes boundaries with clever, safe innovations.
- 3
D Printing: - Safe Filaments: Only use PLA or PETG. ABS will leach toxins and should be strictly avoided.
- Sealing Protocol:
This is CRITICAL. All 3D prints must be soaked in a two-part art-resin (BPA-free) or epoxy to prevent bacterial films from forming in the porous structure and to seal in any potential micro
-leaching. - Aquarium Music™ Tip: We’ve used 3D printed structures for custom filter intakes, unique rock formations, and even miniature architectural elements, always with proper sealing.
Oven-Bake Clay:
-
Safe Clay: Use plain Sculpey (or similar oven-bake polymer clay).
-
Curing: Cure for 15 minutes per 6
mm thickness, then sand smooth. -
Sealing: Must be sealed with a two-part epoxy.
-
❌ Avoid air-dry clay as it disintegrates in water.
-
Lego:
-
Safety: ABS plastic used in Lego is generally inert.
-
Preparation: Rinse thoroughly (no soap!) before use.
-
Usage:
Can be attached to egg-crate for easy removal and used to build structures, caves, or even custom filter guards. -
Foam Backgrounds:
-
Material: Carve **
XPS foam** (extruded polystyrene) with a soldering iron to create realistic rock or wood textures. -
Coating: Coat with Drylok tinted with Quikrete dye for color and sealing.
-
Curing & Testing: Cure for 10 days, then perform a pH-bath until the leach is below 7.4 pH. This ensures it’s safe for your tank.
Calling the Cavalry: When to Hire a Professional
Sometimes, the scale of your vision, lack of time, or specific technical requirements warrant bringing in the experts.
Benefits of Professional Services:
- Expertise and Experience
: Professionals have the knowledge and tools to execute complex designs safely and efficiently. - Quality and Durability: Custom tanks and stands built by pros often come with warranties and are constructed to higher standards.
- Time Savings: You
save countless hours of research, planning, and labor. - Peace of Mind: Knowing your tank is built correctly and safely is invaluable.
- Access to Specialized Materials: Pros often have access to unique materials or fabrication
techniques not available to the average DIYer.
When to Consider a Pro:
- Very Large Tanks: Tanks over 150 gallons, especially those with unusual shapes, often benefit from professional fabrication.
Built-in Aquariums: Integrating a tank seamlessly into cabinetry or a wall requires precision carpentry and structural knowledge.
- Complex Filtration Systems: Custom sumps, plumbing, and automation systems are best designed and installed by experts.
High-End Displays: If you’re aiming for a truly museum-quality display, a professional aquascaper can bring your vision to life with artistic flair and technical mastery.
- Lack of Time or Skill: If you
simply don’t have the time, patience, or specific skills required for a complex DIY project, a professional is a wise investment.
Aquarium Music™ Perspective: “There’s immense satisfaction in building your own, but there’s
also wisdom in knowing your limits. We’ve seen incredible DIY projects, but we’ve also been called in to fix some disastrous ones. Don’t be afraid to tackle smaller DIY projects, but for anything involving significant structural integrity or large
volumes of water, a professional consultation is always a good idea.”
🚫 Common Customization Mistakes and How to Avoid Them
Even the most seasoned aquarists and aquascapers can fall victim to common pitfalls when customizing their
tanks. At Aquarium Music™, we’ve made our share of mistakes (and learned from every single one!), and we’ve seen countless others. Our goal is to arm you with the knowledge to avoid these blunders, ensuring your custom display
remains a source of joy, not headaches.
1. The “Just One More Thing” Syndrome 🤦 ♀️
- The Mistake: This is perhaps the most insidious trap! You start with a clear vision, but
then you see a cool new plant, a unique piece of wood, or a fascinating gadget, and you just have to add it. Suddenly, your minimalist Iwagumi is a cluttered mess, or your carefully balanced biotope has
mismatched elements. “The only downside is the ‘just one more thing’ syndrome—once you start, you might find yourself at 2 a.m. gluing moss to a driftwood branch!”
How to Avoid It:
- Stick to Your Theme: Have a strong, well-defined theme and refer back to it constantly. If an item doesn’t fit the theme, resist the urge!
Plan Ahead: Sketch out your scape, even create a digital mock-up. This helps visualize the final product and prevents impulsive additions.
- Less is Often More: In aquascaping, negative space and thoughtful
placement often have more impact than overcrowding.
2. Ignoring Water Chemistry and Material Safety 🧪
- The Mistake: Introducing un-tested rocks, un-prepared driftwood, or unsafe DIY materials that leach toxins or
drastically alter water parameters. This can lead to sick fish, algae outbreaks, and a constantly unstable environment. - How to Avoid It:
- Test All Rocks: Always perform the vinegar test! If it fizzes
, understand its impact on pH and hardness and choose livestock accordingly, or avoid it entirely for sensitive setups. - Prepare Driftwood: Boil and soak all driftwood until it sinks and the initial heavy tannin release
subsides. - Safe DIY Materials: Stick to PLA or PETG for 3D printing and Sculpey for oven-bake clay. Crucially, always seal these with aquarium
-safe two-part epoxy or resin. Never use ABS plastic or air-dry clay. - Aquarium-Safe Silicone: Only use 100% aquarium-safe silicone (like Momentive RTV108) for any sealing or gluing within the tank.
3. Neglecting Structural Integrity and Safety Protocols 🚧
- The Mistake: Underestimating the immense weight of water (a gallon is over 8 pounds!), using flimsy stands, or improperly assembling custom tanks, especially complex ones like inverted systems.
- How to Avoid It:
- Robust Stands: Ensure your stand is custom-built or reinforced
with strong timber (e.g., 4″ x 2″ timber) and perfectly level. - Proper Assembly: Follow silicone curing times meticulously. Use masking tape for support during curing.
- Thorough Leak Testing: For custom builds, especially inverted tanks, a 24-hour leak test is non-negotiable. Understand the risks: “If the vacuum fails, all that water will drop
into the bottom tank, overflowing it onto the floor!” - Flute Depth: In inverted tanks, ensure the flute’s bottom is at least 4 inches below the base tank’s water level
to prevent flooding during water changes.
4. Poor Planning for Maintenance and Access 🧹
- The Mistake: Creating a beautiful scape that’s impossible to clean, access equipment, or perform
routine maintenance without dismantling everything. - How to Avoid It:
- Service Corridor: Leave a 5cm gap between your hardscape and the back/side glass for hose access, magnetic cleaners, and reaching
equipment. - Accessible Equipment: Position heaters, filter intakes/outtakes, and CO2 diffusers where they can be easily cleaned or adjusted.
- Removable Elements: Consider moss
ledges on suction cups for easy trimming, or hardscape elements that can be lifted out in sections.
5. Overlooking Fish Needs for Aesthetics 🐠
- The Mistake: Prior
itizing a certain look over the health and well-being of your fish. This includes incompatible tank mates, insufficient hiding spots, or inappropriate water parameters for the chosen species. - How to Avoid It:
Fish-First Design: Always research the needs of your desired fish before finalizing your design.
- Provide Shelter: Ensure your hardscape and plants offer ample hiding places and territories.
- Appropri
ate Flow: Some fish prefer strong currents, others calm water. Design your filtration and powerhead placement accordingly. - Lighting Considerations: While adjustable LEDs are great, “make sure your color changes don’t stress out your fish
“. Avoid extreme or rapid changes.
6. Rushing the Process ⏱️
- The Mistake: Impatience is the enemy of a successful aquarium. Rushing cycling, adding too
many fish too soon, or not allowing materials to cure properly. - How to Avoid It:
- Patience, Patience, Patience: The aquarium hobby rewards patience. Cycle your tank fully, introduce fish slowly
, and allow time for plants to establish. - Curing Times: Respect silicone and epoxy curing times. It’s better to wait an extra day than to deal with a leak or toxic leaching.
By being aware
of these common mistakes and proactively planning to avoid them, you’ll be well on your way to creating a stunning, unique, and most importantly, healthy custom aquarium that brings you endless enjoyment.
🔧 Maintenance of Personalized Displays: Keeping Your
Unique Tank Thriving
You’ve poured your creativity, time, and perhaps a few drops of sweat into crafting your personalized aquarium. Now, the real work (and continued joy!) begins: maintaining that unique display. Custom tanks, with
their intricate hardscapes, dense planting, and sometimes complex structural modifications, require a thoughtful approach to upkeep. At Aquarium Music™, we know that a well-maintained tank is a thriving tank, and that’s the symphony we strive for!
The Daily Grind: Routine Care for Custom Setups
Even with the most elaborate designs, daily and weekly tasks remain the backbone of aquarium health.
- Daily Visual Inspection:
- Fish Behavior: Are all
your fish active, eating well, and showing no signs of disease? - Equipment Check: Are filters running, heaters on, lights functioning?
- Plant Health: Any yellowing leaves, algae growth, or signs of
nutrient deficiency? - Water Level: Top off evaporated water with dechlorinated (and RO/DI if applicable) water.
- Weekly Water Changes:
- Consistency is Key: Regular water changes (typically 25-50% weekly or bi-weekly, depending on bioload) are crucial for removing nitrates and replenishing essential minerals.
- Vacuuming Substrate: Gently vacuum the substrate to remove detritus and
uneaten food. For heavily planted tanks, focus on open areas and use a smaller siphon to avoid disturbing roots. - Filter Maintenance: Rinse mechanical filter media (sponges, floss) in old tank water during your
water change to preserve beneficial bacteria. Don’t clean biological media too often or too aggressively. - Algae Control:
- Magnetic Glass Cleaners: These are invaluable for keeping the glass pristine without getting your hands wet
, especially in tanks with complex internal structures. Brands like Mag-Float or Fluval Razor are excellent. - Algae Scrapers: For tougher spots, a blade scraper might
be necessary. - Natural Clean-up Crew: As mentioned, Otocinclus, Siamese Algae Eaters, and smaller Plecos (like Bristlenose) can be a huge help in hard-to-reach
areas. Snails are also fantastic.
Navigating the Nuances of Custom Designs
Your unique customization might introduce specific maintenance considerations.
- The Inverted Tank: Special Water Change Protocol!
This is critical! Do not let the water level in the base tank drop below the flute neck during water changes. If air rushes into the flute, the vacuum will fail violently, potentially breaking the tank and certainly
causing a massive flood. Always ensure the flute remains submerged.
-
Air Features: If you have air stones or bubbles in the main tank, ensure they do not enter the top inverted tank, as this
will reduce the vacuum and can cause flooding. -
Dense Plant Growth: Requires regular trimming to prevent overcrowding, maintain light penetration, and ensure healthy growth. Invest in good aquascaping scissors and tweezers.
-
Complex Hardscapes: While beautiful, intricate rock and wood formations can trap detritus. Use a small, flexible siphon or a turkey baster to blast debris out of crevices during water changes. Remember those “shadow gaps” to
aid in detritus removal. -
3D Printed/Sealed Decor: Periodically inspect any 3D printed or sealed clay decor for signs of wear, peeling, or bacterial film buildup. If the
seal is compromised, remove and re-seal the item.
Seasonal Swaps and Renter-Safe Customizations
Want to keep things fresh or need temporary changes?
- Seasonal Swaps: During a 25
% water change, you can safely swap out certain decor elements to match holidays or seasons, minimizing fish stress. - Halloween: Add orange Indian almond leaves (which also provide beneficial tannins!) and a ceramic skull
. - Christmas: Green and red suction-cup moss ornaments can be festive.
- Valentine’s Day: Rose quartz chips (thoroughly rinsed!)
can add a touch of romance. - Renter-Safe Customizations: If you can’t make permanent changes, don’t despair!
- Rare-Earth Magnets:
Coated in epoxy putty, these can be used to create shelves or attach decor without drilling into the tank. - Window-Cling Backdrops: These are easy to apply, remove, and even flip up
for inspections. Printing companies can create high-quality, sizable images for custom backdrops.
Aquarium Music™ Anecdote: Our client, a busy professional, loved the idea of a themed
tank but couldn’t commit to constant re-scaping. We helped her create a modular system with magnetic decor elements and seasonal plant arrangements that she could swap out in minutes. Her tank transforms from a spooky Halloween scene to a winter wonderland with
minimal effort, keeping her engaged and her fish happy!
👉 CHECK PRICE on:
- Mag-Float Magnetic Aquarium Cleaner: Amazon | Chewy |
Petco - Fluval Razor 2-in-1 Algae Scraper: Amazon | Fluval Official Website
- Aquascaping Scissors and Tweezers Set: Amazon | eBay
🏆 12 Unique Ideas You Should Use To Customize Your Fish Tank
Ready to transform your aquarium from ordinary to extraordinary? We’ve gathered 12 unique, engaging, and sometimes mind-bending ideas
to inspire your next customization project. Drawing from our team’s experience and the cutting edge of aquascaping, these concepts will help you create a display that truly stands out!
-
The Gravity-Defying In
verted Tank: As discussed earlier, this advanced DIY project creates a smaller top tank that hangs above a larger base, connected by a vacuum-sealed flute. Fish can swim freely into the upper chamber, seemingly defying gravity! It’s a
true conversation piece and a unique habitat for species like Bettas and Angelfish. -
Miniature World Diorama: Take inspiration from the featured video [cite: #featured-video]!
Create an intricate miniature scene within your tank, complete with tiny houses on stilts, detailed landscapes of rocks and sand, and even miniature boats and oars. The video shows a creator building a wooden platform, assembling glass panels, and adding a house
with lighting and an air conditioning unit – a truly immersive tiny ecosystem. -
The Sci-Fi Cyberpunk Alley: Dive into a futuristic urban landscape. Use matte black PVC pipe off-cuts to create “ventilation shafts
” and “buildings.” Install RGB LED pucks under the rim to uplight frosted acrylic panels, simulating holographic displays. Add neon-colored plants or 3D-printed sci-fi elements (properly sealed, of course!) for
a truly unique vibe. -
Lost Roman City / Atlantis Biotope: Create an ancient, submerged ruin. Use carefully placed, inert stone pillars, broken arches, and perhaps a miniature, sealed Roman statue
. Black Diamond blasting sand can mimic ancient silt. Pair with schooling fish like Cardinal Tetras or peaceful Cichlids that would look at home among ruins. -
The Enchanted Forest (Dutch Style with a Twist): Combine the dense, vibrant planting of the Dutch style with strategically placed, moss-covered driftwood to create an ethereal underwater forest. Focus on contrasting plant colors and textures, using species like Ludwigia ‘Super Red’ for fiery accents
and various mosses for an ancient, overgrown feel. -
Zen Iwagumi with a Twist of Color: While traditional Iwagumi is minimalist, you can introduce subtle pops of color. Use classic
Seiryu Stone formations, but instead of only Cuba pearl grass, incorporate small patches of red Alternanthera reineckii ‘Mini’ or a vibrant green Marsilea hirsuta for unexpected visual interest. -
The “Living Wall” Background: Instead of a static backdrop, create a vertical garden on the back of your tank. Attach various mosses, Anubias, and Java Ferns to a mesh or plastic grid
secured to the back glass. Over time, it will grow into a lush, dynamic green wall, adding incredible depth and biological filtration. -
The Harry Potter Potion Class: For the fantasy enthusiast! Use Black Diamond blasting sand as
your substrate. Incorporate sealed Etsy potion bottles (with silicone/cork) containing poly-resin “smoke” or colored sand. Add miniature scrolls, quills, and perhaps a small, inert ceramic cauldron. Low, moody lighting would
complete the magical ambiance. -
Custom Stand, Integrated Display: Your tank stand doesn’t have to be just a box. Customize it to resemble a vintage television, a giant Lego brick, or an
elegant vanity. The stand itself becomes part of the display, enhancing the overall aesthetic of your room. Just ensure it can fit your tank, heater, and pump, and is structurally sound.
1 -
The “Floating Island” Aquascape: Use buoyant driftwood (like cholla wood or specially prepared light woods) secured with fishing line or suction cups to create the illusion of islands floating above your substrate. Plant these “islands” with
epiphytes like Anubias or Bucephalandra for a truly unique, multi-layered look. -
Rimless Tank, Endless Horizon: Opt for a rimless aquarium to create a seamless, unobstructed view of your aquatic
world. This gives the impression that your scape was “plucked right out of the ocean,” offering a clean, modern aesthetic that highlights the beauty within. -
The Biotope with a Seasonal Twist: While
a biotope aims for authenticity, you can introduce subtle, temporary seasonal elements during water changes without compromising its integrity. For example, in an Amazonian biotope, add extra Indian almond leaves for a “fall” look, or a few carefully
placed, inert river stones for a “winter” feel.
Which idea sparks your imagination the most? The beauty of customization is that you can combine elements, adapt concepts, and truly make your aquarium a reflection of *
you*.
🧪 The Science of Water Chemistry in Custom Setups
Alright, aquarists, let’s get a little scientific! While the aesthetics of your custom tank are paramount, understanding the underlying water chemistry is the true
secret to a thriving, stable, and healthy aquatic environment. At Aquarium Music™, we know that beauty without biology is fleeting. Your custom choices, from hardscape to substrate, have a profound impact on your water parameters, and ignoring them is
like building a Ferrari with a lawnmower engine – it looks great, but it won’t go anywhere fast!
The pH Factor: Hardscape’s Hidden Influence
We’ve already touched on the vinegar test
for rocks, but let’s delve deeper into why it’s so important.
- Calcium Carbonate (CaCO3): Many rocks, especially those collected from limestone-rich areas or decorative stones like Texas
Holey Rock, contain calcium carbonate. When exposed to water, especially slightly acidic water, these rocks will slowly dissolve, releasing calcium and carbonate ions. - Impact on pH and Hardness:
pH (Potential of Hydrogen): The measure of how acidic or alkaline your water is. Calcium carbonate acts as a buffer, resisting changes in pH and typically raising it to an alkaline range (7.5-8.5+).
*
GH (General Hardness): Measures the concentration of dissolved mineral ions, primarily calcium and magnesium.
- KH (Carbonate Hardness/Alkalinity): Measures the concentration of carbonates and bicarbonates,
which act as a buffer against pH swings. - Balancing Act:
- ✅ Good for: Fish that naturally inhabit hard, alkaline water, such as African Cichlids from the Rift Lakes (Malawi, Tanganyika, Victoria) or livebearers like Guppies and Mollies.
- ❌ Bad for: Fish that require soft, acidic water, such as Discus, many Tetras (e.g., Cardinal Tetras), and
most species of Caridina shrimp. For these species, a pH increase can cause severe stress, osmoregulation issues, and even death. - Aquarium Music™ Insight: “We once had a client who
loved the look of some beautiful, white, porous rocks for his planted tank with Discus. Despite our warnings, he insisted. Within weeks, his Discus were clamped, stressed, and showing signs of illness. The pH had crept up to
8.2! We had to remove all the rocks and perform massive water changes to stabilize the tank. It was a costly lesson in chemistry.”
Substrate: More Than Just a Pretty Base
Your substrate isn’t just inert
gravel; it can actively influence water chemistry.
- Nutrient-Rich Substrates (e.g., ADA Aqua Soil, Controsoil): These specialized substrates are designed for planted tanks. They are often clay-based
and contain humic acids and other organic compounds that slowly release nutrients for plants. Crucially, many of them also have a buffering capacity that lowers and stabilizes pH, typically in the acidic range (6.0-6.8),
which is ideal for many aquatic plants and softwater fish. - Aragonite/Crushed Coral: These are calcium carbonate-based substrates primarily used in marine tanks or African Cichlid tanks. They
actively dissolve, buffering the pH up and maintaining high hardness. - Inert Substrates (e.g., Pool Filter Sand, Black Diamond Blasting Sand): These have minimal to no impact on water chemistry, making them a
safe choice when you want to control parameters through other means (e.g., RO/DI water, chemical buffers).
The Power of Tannins: Driftwood’s Gift
Driftwood, particularly types like Manzanita
or Malaysian wood, releases tannins into the water.
-
Benefits:
-
Lower pH: Tannins are mildly acidic and can help lower pH, creating a “blackwater” effect.
-
Antimicrobial Properties: They can inhibit the growth of some harmful bacteria and fungi.
-
Natural Look: Creates a natural, tea-stained appearance that many fish (especially blackwater species) thrive in.
-
Stress Reduction: The darker water can make fish feel more secure and reduce stress.
-
Considerations: The initial tannin release can be significant, turning your water very dark. Boiling and prolonged soaking of driftwood before adding
it to the tank can reduce this effect.
Monitoring Your Masterpiece: Essential Tools
To truly master your custom tank’s chemistry, regular monitoring is essential.
- Liquid Test Kits: Reliable
liquid test kits (e.g., API Freshwater Master Test Kit) are a must for regularly checking pH, ammonia, nitrite, and nitrate. - GH/KH Test Kits: Especially important if you’re using rocks or
substrates that influence hardness. - Digital pH Meter: For precise pH monitoring, particularly in CO2-injected planted tanks. A smart controller like the Fzone Mini Regulator paired with an Atlas Scientific pH Probe can even send you
WhatsApp alerts if your pH dips too low, preventing CO2 poisoning. - TDS Meter: Measures Total Dissolved Solids, giving you a general idea of the mineral content in your water. Useful for
RO/DI water users.
Understanding and actively managing the water chemistry in your custom aquarium is not just a chore; it’s a fundamental aspect of responsible fishkeeping and the key to unlocking the full potential of your unique display.
📸 Capturing the Beauty: Photography Tips for Your Custom Aquarium
You’ve poured your heart and soul into creating a unique and beautiful aquatic display. Now, you want to share it with the world, or simply preserve its beauty for yourself
! Photographing aquariums can be tricky, with reflections, glare, and challenging lighting. But with a few expert tips from the Aquarium Music™ team, you’ll be capturing stunning shots of your custom masterpiece in no time!
- Lighting is Everything (and You Already Have It!) 💡
- Leverage Your Tank Lights: Your aquarium lights are your primary light source. Experiment with different color temperatures and intensities. For vibrant plant and fish colors, a
full-spectrum LED around 6500K is often ideal. - Turn Off Room Lights: Eliminate reflections and glare by turning off all other lights in the room. This ensures your tank’s lighting
is the dominant source. - Experiment with Angles: Sometimes, a slight angle to your camera can minimize reflections from the glass.
2. Cleanliness is Next to Godliness (for Your Glass) ✨
Sparkling Glass:** This is non-negotiable. Algae, water spots, and fingerprints on the glass will ruin your photos. Use a magnetic cleaner or algae scraper just before shooting. Clean the outside of the
glass with a lint-free cloth and glass cleaner (spray onto the cloth, not directly onto the tank).
- Clear Water: Ensure your water is crystal clear. Perform a water change and clean your filter a day or two before your
shoot.
3. Camera Settings for Success 📸
- Use a Tripod: Essential for sharp images, especially in lower light conditions.
- Manual Mode (if possible):
- ISO
: Keep ISO as low as possible (e.g., 100-400) to minimize noise. - Aperture (f-stop): Start with f/8 or f/1
1 for good depth of field, ensuring both foreground and background are in focus. - Shutter Speed: Adjust as needed. For still shots, you might be able to go slower (e.g., 1/60th sec). For moving fish, you’ll need a faster speed (e.g., 1/250th sec or faster) to freeze motion.
- White Balance: Set your white balance manually or
use a preset (like “daylight” or “fluorescent”) to ensure accurate colors. Auto white balance can sometimes struggle with aquarium lighting. - Polarizing Filter: If you have a DSLR or mirrorless camera, a circular
polarizing filter can work wonders in reducing reflections and glare.
4. Focus on the Stars (Your Fish and Scape) 🐠🌿
- Patience with Fish: Fish are rarely cooperative models! Wait for them
to be in a good position, perhaps enticing them with a small pinch of food. - Composition: Apply the Rule of Thirds or Golden Ratio to your photo composition, just as you did in your aquascape design. Place your main
subject (a hero fish, a stunning plant grouping) off-center for a more dynamic shot. - Capture Details: Don’t just take wide shots. Get close-ups of interesting hardscape textures
, delicate plant leaves, or the intricate patterns on your fish.
5. Post-Processing: The Final Polish ✨
- Subtle Adjustments: A little post-processing can go a long way. Adjust exposure
, contrast, highlights, and shadows. - Color Correction: Fine-tune colors to make them pop, but avoid over-saturation, which can make your tank look unnatural.
- Cropping: Crop to improve composition and remove
distracting elements.
Aquarium Music™ Anecdote: Our social media manager, Chloe, spent weeks trying to get the perfect shot of our inverted tank’s fish swimming in the upper chamber. She discovered that shooting just after feeding
time, when the fish were most active and curious, yielded the best results. She also found that a simple black cloth draped over the camera lens and against the tank glass dramatically reduced reflections. The resulting photos were pure magic!
By following these tips,
you’ll be able to capture the true essence and beauty of your custom aquarium, sharing your passion and inspiring others to dive into the world of aquatic art!