Support our educational content for free when you purchase through links on our site. Learn more
🐠 7 Proven Steps to Introduce New Fish Without Stress or Disease (2026)

You’ve just brought home a vibrant new addition to your aquatic family, the bag is in your hand, and the excitement is palpable. But pause for a second: have you ever wondered why that same fish, looking so healthy in the store tank, can turn pale and listless within hours of hitting your “perfect” water? It’s a heartbreaking scenario that plagues even seasoned hobbyists, often due to a single, invisible culprit: osmotic shock. At Aquarium Music™, we’ve seen tanks decimated not by bad water, but by good intentions and rushed introductions. The truth is, your new fish isn’t just entering a tank; it’s stepping into a completely different chemical universe, and their biology needs time to recalibrate.
In this comprehensive guide, we’re going beyond the basic “float the bag” advice that leaves so many fish vulnerable. We’ll dive deep into the 7 Critical Steps that separate a thriving community from a graveyard of stress-induced illness. From the science of drip aclimation to the non-negotiable protocol of quarantine, we’ll reveal the exact methods used by professional aquascapers to ensure every new arrival integrates smoothly. We’ll also uncover the hidden dangers of “New Tank Syndrome” and how a simple mistake in water chemistry can trigger a cascade of disease. By the end of this article, you’ll know exactly how to tune your new fish to the symphony of your established tank, ensuring they don’t just survive, but thrive.
Key Takeaways
- Quarantine is Non-Negotiable: Isolate new arrivals for 2–4 weeks in a bare-bottom tank to prevent introducing parasites like Ich or Velvet to your main display.
- Master the Drip Method: For sensitive species and significant parameter differences, the drip aclimation method is the only safe way to gradually adjust pH, hardness, and temperature.
- Never Dump the Bag Water: Always net the fish and leave the shipping water behind to avoid introducing high levels of ammonia and pathogens into your pristine ecosystem.
- Monitor Water Chemistry: Understand the critical roles of pH, KH, and GH in preventing osmotic shock, and test your water before every introduction.
- Observe Relentlessly: Watch for signs of distress like clamped fins or gasping for the first 24 hours post-introduction to catch issues early.
Table of Contents
- ⚡️ Quick Tips and Facts
- 🧬 The Evolution of Aclimation: Why Your New Fish Are Stressed Before They Even Arrive
- 🛑 The Golden Rules: 7 Critical Steps to Prevent Shock and Disease in Your Established Tank
- 1. The Quarantine Protocol: Isolation Before Integration
- 2. Temperature Matching: The Silent Stressor
- 3. The Drip Aclimation Method: Slow and Steady Wins the Race
- 4. The Floating Bag Technique: When Time is of the Essence
- 5. Water Parameter Balancing: pH, Hardness, and Amonia Sensitivity
- 6. The Net Transfer: Why You Should Never Dump the Bag Water
- 7. Post-Aclimation Observation: Reading the Signs of Distress
- 🦠 Disease Prevention Mastery: Quarantine Tanks, Medication, and Biosecurity
- 🧪 Water Chemistry Deep Dive: Understanding pH, KH, GH, and Salinity Shifts
- 🐠 Species-Specific Aclimation Strategies: From Beta to Discus
- 🚫 Common Aclimation Mistakes That Kill Fish (And How to Avoid Them)
- 🛠️ Essential Tools and Gear for a Stress-Free Introduction
- 📊 Aclimation Method Comparison: Drip vs. Float vs. Splash
- 🌊 Fresh Water & Aquarium Fish: Adapting to Your Unique Ecosystem
- 💡 Quick Tips and Facts
- 🏁 Conclusion
- 🔗 Recommended Links
- ❓ FAQ
- 📚 Reference Links
⚡️ Quick Tips and Facts
Welcome to the Aquarium Music™ family! Before we dive into the deep end of aclimation theory, let’s hit the high notes. You’ve just brought home a beautiful new fish, and you’re itching toss it into your pristine, established tank. Stop! 🛑 That urge is the number one cause of “New Fish Syndrome,” where your new buddy turns into a floating balloon within hours.
Here are the non-negotiables to keep your aquatic symphony in tune:
- The Golden Rule: Never pour the water from the shipping bag into your display tank. That water is a petri dish of potential parasites, bacteria, and algae from the store or breder.
- The Time Factor: Rushing is the enemy. A proper aclimation process should take at least 30 to 60 minutes, and up to 2 hours for sensitive species like Discus or sensitive shrimp.
- The Quarantine Imperative: The single best way to prevent disease is not aclimation; it’s quarantine. Isolate new arrivals for 2–4 weeks before they meet your main tank crew.
- Temperature is King: Thermal shock kills faster than bad chemistry. Ensure the bag water matches your tank temperature within 1°F before opening the bag.
- Lighting Off: Turn off your tank lights during aclimation. New fish are stressed and hiding; bright lights will only terrify them further.
Pro Tip: If you’re wondering how to keep your tank cycle stable while adding new bioload, check out our deep dive on 🌊 15 Secrets to Mastering Your Tropical Fish Tank for a complete guide on maintaining that delicate nitrogen balance.
🧬 The Evolution of Aclimation: Why Your New Fish Are Stressed Before They Even Arrive
Have you ever wondered why a fish that looked vibrant in the store tank turns pale and listless the moment it hits your water? It’s not magic; it’s physiological shock.
To understand aclimation, we have to look at the fish’s journey. When a fish is caught, baged, and shipped, it undergoes a massive stress event. The water in the bag is often stagnant, oxygen-depleted, and filled with high levels of ammonia from their own waste. Their gills are working overtime just to breathe.
When you finally bring them home, you are about to subject them to a second, potentially lethal stressor: Osmotic Shock.
Fish are osmoregulators. They constantly balance the salt and water levels in their bodies against the water outside.
- Freshwater Fish: Their bodies are saltier than the water, so water constantly floods in, and they must pee out excess water while retaining salts.
- Saltwater Fish: Their bodies are less salty than the water, so they constantly lose water and must drink to survive, excreting excess salt.
If you drop a fish from a store with a pH of 7.0 into your tank with a pH of 6.2, or change the temperature by 10 degrees instantly, their cells literally swell or shrink. This damages their gill tissues, compromises their immune system, and opens the door for Ich, Fin Rot, and Columnaris.
As the experts at Aquarium Music™ often say, “You aren’t just moving a fish; you’re moving an entire ecosystem inside a tiny bag.” The goal of aclimation isn’t just to get the fish wet; it’s to gently coax their internal chemistry to match your tank’s environment without tearing their biology apart.
🛑 The Golden Rules: 7 Critical Steps to Prevent Shock and Disease in Your Established Tank
We’ve all been there: the excitement of the new fish, the bag in hand, the net ready. But patience is the aquarist’s greatest virtue. Here are the 7 Critical Steps we follow at Aquarium Music™ to ensure a smooth introduction.
1. The Quarantine Protocol: Isolation Before Integration
Before we even think about aclimation, we must talk about Quarantine (QT). This is the most debated topic in the hobby, yet the most ignored.
- Why? Many diseases have an incubation period. A fish can look healthy but be carrying Ich, Velvet, or internal parasites.
- The Setup: A bare-bottom tank (no gravel, no plants) with a simple sponge filter and heater. This makes it easy to spot waste and treat the water if necessary.
- Duration: 2 to 4 weeks. If the fish shows no signs of illness after 14 days, the risk drops significantly. After 28 days, they are generally safe to introduce.
Expert Insight: “I once lost a tank of expensive Discus because I skipped the QT. A single carrier of Velvet wiped out the whole school in 48 hours. Never again.” — Senior Aquarist, Aquarium Music™
2. Temperature Matching: The Silent Stressor
Thermal shock is the fastest way to kill a fish. Even a 5°F difference can be fatal to sensitive species.
- The Float: Leave the sealed bag floating in your tank for 15–20 minutes.
- The Check: Use a reliable thermometer (like the Seachem Digital Thermometer) to verify the temperatures match.
- The Goal: The water inside the bag must be within 1°F of the tank water.
3. The Drip Aclimation Method: Slow and Steady Wins the Race
For most fish, especially sensitive ones like Discus, Rams, and Shrimp, the Drip Method is the gold standard. It allows for a gradual change in water chemistry (pH, hardness, salinity).
How to do it:
- Prepare: Use airline tubing and a valve (like the Seachem Drip Kit or a simple airline clamp).
- Transfer: Move the fish and the bag water into a clean bucket.
- Drip: Start a siphon from your tank to the bucket. Adjust the flow to about 2–4 drips per second.
- Wait: Let the water volume in the bucket double or triple over 45–60 minutes.
- Release: Net the fish and place it in the tank. Do not pour the bucket water in!
4. The Floating Bag Technique: When Time is of the Essence
If you have a hardy fish (like Guppies, Mollies, or Platies) and the water parameters are very similar, the Floating Bag Method (also known as the Splash Method) is acceptable.
- Float: 15–20 minutes.
- Open: Open the bag and roll the top down to create a rim.
- Add: Add small amounts of tank water every 5 minutes for 30 minutes.
- Release: Net and release.
Note: This method is risky if your tank water is significantly different from the store water.
5. Water Parameter Balancing: pH, Hardness, and Amonia Sensitivity
Your fish came from a specific water profile. If your tap water is hard (high GH) and the store water was soft, a sudden shift can cause osmotic shock.
- Test First: Always test your tap water and the store water (if possible) using a liquid test kit like the API Freshwater Master Test Kit.
- Adjust Gradually: If the difference is massive, consider using RO/DI water mixed with remineralizers (like Seachem Replenish) to bridge the gap during the drip process.
6. The Net Transfer: Why You Should Never Dump the Bag Water
This is the rule we repeat until our voices go hoarse: NEVER pour the bag water into your tank.
- The Risk: The bag water contains high concentrations of ammonia, nitrites, and potential pathogens from the shipping environment.
- The Action: Use a fine-mesh net (like the Hydor Super Net) to gently scoop the fish out of the bucket/bag and place it directly into the tank. Leave the dirty water behind.
7. Post-Aclimation Observation: Reading the Signs of Distress
The job isn’t done once the fish is in the tank. Watch them for the next 24 hours.
- Normal Behavior: Hiding initially, then exploring, normal swimming.
- Distress Signs: Gasping at the surface, clamped fins, rapid gill movement, flashing (rubing against objects), or lethargy.
- Action: If you see distress, check your water parameters immediately. You may need to perform a partial water change or move the fish back to quarantine.
🦠 Disease Prevention Mastery: Quarantine Tanks, Medication, and Biosecurity
Let’s get real. Aclimation is the last line of defense. The first line of defense is Biosecurity.
The Quarantine Tank Setup
A proper QT tank doesn’t need to be fancy. It needs to be functional.
- Tank Size: 10–20 gallons is usually sufficient for most community fish.
- Filtration: A sponge filter is ideal. It provides biological filtration without the suction risk for small fish.
- Heating: A reliable heater (like the Eheim Jager or Fluval M-Series) set to the target temperature.
- Substrate: None. A bare bottom makes it easy to spot parasites and clean up waste.
Medication Protocols
Should you medicate every new fish? This is a topic of debate.
- Pro-Medication: Some aquarists use a broad-spectrum treatment (like Seachem ParaGuard or API General Cure) for the first 5–7 days of quarantine to kill external parasites and internal worms.
- Pro-Observation: Others argue that medicating healthy fish can stress them and disrupt the beneficial bacteria in the QT tank. They prefer to treat only if symptoms appear.
Our Recommendation: At Aquarium Music™, we lean towards preventative observation for hardy fish, but proactive treatment for sensitive species (like Discus, Angelfish, or wild-caught fish). If you choose to medicate, always follow the dosage instructions on the bottle and remove carbon from the filter.
Did you know? Many “new tank syndrome” outbreaks are actually caused by Ich that was incubating in a new fish. The quarantine period breaks the life cycle of the parasite before it can infect your main tank.
🧪 Water Chemistry Deep Dive: Understanding pH, KH, GH, and Salinity Shifts
Why does pH matter so much during aclimation? It’s all about buffers.
- pH (Potential of Hydrogen): Measures acidity/alkalinity. A sudden drop in pH can cause “pH shock,” damaging gill tissues.
- KH (Carbonate Hardness): The buffer that stabilizes pH. Low KH means pH can swing wildly.
- GH (General Hardness): The concentration of dissolved minerals (Calcium, Magnesium). This is crucial for osmoregulation.
The Danger of “Crashing”
If you drip tank water (high KH) into a bucket of soft water (low KH) too fast, the pH can crash. This is why the Drip Method is superior; it allows the KH to adjust gradually, preventing a pH crash.
Table: Common Parameter Shifts and Risks
| Parameter | Safe Shift per Hour | Risk of Rapid Shift | Species Most Affected |
|---|---|---|---|
| Temperature | < 1°F | Thermal Shock, Death | Discus, Tetras, Shrimp |
| pH | < 0.2 units | pH Shock, Gill Damage | Discus, Rams, Cichlids |
| GH | < 10 ppm | Osmotic Shock | Shrimp, Livebearers |
| Salinity | < 0.1 ppt | Dehydration/Edema | Brackish Fish, Marine |
Source: Adapted from Aquarium Co-op Water Chemistry Guides.
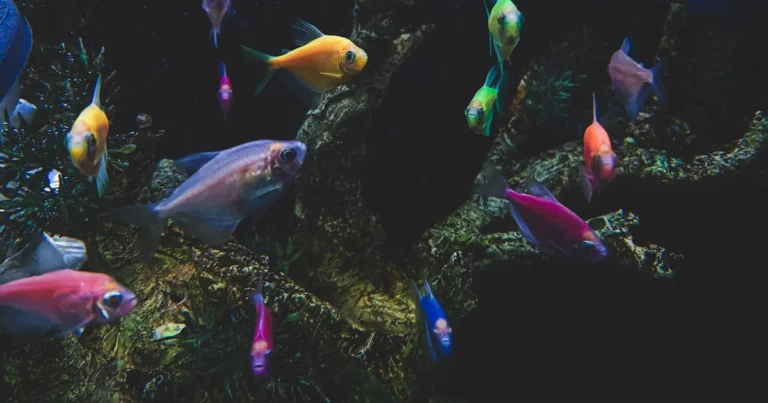
🐠 Species-Specific Aclimation Strategies: From Beta to Discus
One size does not fit all. A Beta fish has different needs than a Discus.
The Beta Fish (Betta splendens)
- Temperament: Solitary and territorial.
- Aclimation: Use the Floating Bag Method for 20 minutes, then drip for 30 minutes. Bettas are labyrinth fish and can breathe air, but they still suffer from water parameter shock.
- Tip: Do not add them to a tank with aggressive fin-nippers like Tiger Barbs.
The Discus (Symphysodon)
- Temperament: Peaceful but sensitive.
- Aclimation: Strict Drip Method for 2+ hours. Discus are notorious for “New Tank Syndrome” due to pH swings.
- Tip: Keep the lights off and the water very clean. They are sensitive to ammonia.
The Shrimp (Neocaridina/Caridina)
- Temperament: Scavengers.
- Aclimation: Drip Method is mandatory. Shrimp are incredibly sensitive to copper and sudden GH changes.
- Tip: Add a piece of Indian Almond Leaf to the bucket to soften the water and provide tannins.
The Cichlids (African vs. South American)
- African Cichlids: Need high pH and high hardness. If your tank is soft, you may need to add Seachem Alkaline Buffer to the drip water to match the target pH.
- South American Cichlids: Prefer soft, acidic water. If your tap water is hard, use RO water for the drip.
🚫 Common Aclimation Mistakes That Kill Fish (And How to Avoid Them)
We’ve seen it all. Here are the top ways people accidentally kill their new fish.
-
The “Dump and Run”: Pouring the bag water into the tank.
Result: Introduction of parasites and ammonia spikes.
Fix: Always net the fish. -
The “Speed Run”: Aclimating in 5 minutes.
Result: Osmotic shock and death.
Fix: Set a timer. 45 minutes is the minimum for most species. -
The “Light Show”: Keeping the tank lights on during aclimation.
Result: Extreme stress, hiding, and refusal to eat.
Fix: Turn off the lights. -
The “Overcrowding”: Adding too many fish at once.
Result: Bioload spike, ammonia crash, and stress for existing fish.
Fix: Add fish in small batches, waiting a week between additions. -
Ignoring the “New Tank” Cycle: Adding fish to a tank that isn’t fully cycled.
Result: Amonia poisoning.
Fix: Always test for Amonia and Nitrite before adding new fish.
🛠️ Essential Tools and Gear for a Stress-Free Introduction

You can’t do this with just a net and a bucket. Here is the Aquarium Music™ essential kit:
- Drip Aclimation Kit: The Seachem Drip Kit is the industry standard. It includes the tubing, valve, and suction cup.
👉 CHECK PRICE on: Amazon | Chewy | Seachem Official - Digital Thermometer: Essential for precision. The Seachem Digital Thermometer is accurate and easy to read.
👉 CHECK PRICE on: Amazon | Petco - Fine Mesh Net: A net with a soft mesh (like Hydor or Aqueon) prevents damage to delicate fins and slime coats.
👉 CHECK PRICE on: Amazon | PetSmart - Water Testing Kit: The API Freshwater Master Test Kit is the most reliable liquid test kit on the market.
👉 CHECK PRICE on: Amazon | Bulk Reef Supply - Bottled Bacteria: To boost the cycle when adding new fish. Seachem Stability or Fritz Turbo Start 70.
👉 CHECK PRICE on: Amazon | Chewy
📊 Aclimation Method Comparison: Drip vs. Float vs. Splash
Not sure which method to use? Here is a quick comparison to help you decide.
| Method | Best For | Time Required | Complexity | Risk Level |
|---|---|---|---|---|
| Drip Method | Sensitive species (Discus, Shrimp), Large pH/GH differences | 45–120 mins | High | Low |
| Float & Add | Hardy species (Guppies, Mollies), Similar water params | 30–45 mins | Medium | Medium |
| Bag Float Only | Very hardy fish, Emergency situations | 15–20 mins | Low | High |
Why the difference?
The Drip Method allows for a gradual change in all parameters (pH, GH, KH, Temperature). The Float & Add method primarily adjusts temperature and allows for some chemical exchange, but it’s faster and less precise. The Bag Float Only method is a last resort and carries a high risk of shock.
🌊 Fresh Water & Aquarium Fish: Adapting to Your Unique Ecosystem
Every aquarium is a unique ecosystem. Your tap water, your substrate, your plants, and your existing fish all contribute to the water chemistry. When introducing a new fish, you aren’t just adding a creature; you’re adding a new variable to a complex equation.
At Aquarium Music™, we believe in mimicking nature. If you have a tank with driftwood and leaf litter (like a Blackwater tank), your pH will naturally be lower. If you have crushed coral, your pH will be higher.
The “Symphony” Analogy:
Think of your tank as an orchestra. The existing fish are the musicians. The water parameters are the sheet music. When you introduce a new fish, you are adding a new instrument. If the new instrument is tuned to a different key (different pH or temperature), the music sounds terrible (stress and disease). Aclimation is the process of tuning the new instrument to match the rest of the orchestra.
Key Takeaway:
Always know your water parameters before you buy a fish. If your tap water is hard and alkaline, don’t buy soft-water fish like Cardinal Tetras unless you are willing to invest in an RO/DI system.
💡 Quick Tips and Facts
Wait, we said were done with tips, but we have one more!
- The “Stress Coat” Myth: Many people use products like API Stress Coat during aclimation. While these can help repair slime coats, they are not a substitute for proper aclimation. They are a band-aid, not a cure.
- The “Night Release” Trick: Some aquarists prefer to aclimate and release fish at night when the tank is dark. This reduces stress and allows the fish to settle in before the lights come on.
- The “Feding Fast”: Do not feed new fish for the first 24 hours. They are stressed and won’t eat. Feding them can foul the water and increase ammonia.
🏁 Conclusion

So, we’ve journeyed from the moment the bag hits the water to the final release of your new aquatic friend. We’ve covered the evolution of stress, the 7 critical steps of aclimation, the necessity of quarantine, and the nuances of water chemistry.
Remember, the goal isn’t just to keep the fish alive; it’s to help them thrive. By taking the time to drip aclimate, quarantine, and observe, you are building a foundation for a healthy, vibrant, and long-lasting aquarium.
The Final Note:
Did you ever wonder why some fish seem to bounce back instantly while others fade away? It’s often the difference between a rushed introduction and a thoughtful one. The fish that survive the aclimation process are the ones that have been given the best chance to adapt.
Our Recommendation:
If you are new to the hobby, always use the Drip Method and always use a Quarantine Tank. It might seem like extra work, but it saves you from the heartbreak of losing fish and the cost of treating diseases later.
Ready to dive deeper?
Check out our Aquarium Setup category for guides on building the perfect quarantine tank, or explore our Fish Care and Species Profiles to learn more about the specific needs of your new favorite fish.
🔗 Recommended Links
Here are the essential products and resources we recommend for a successful fish introduction:
- Seachem Drip Kit: Amazon | Chewy | Seachem Official
- API Freshwater Master Test Kit: Amazon | Petco
- Seachem Stability (Bottled Bacteria): Amazon | Bulk Reef Supply
- Fritz Turbo Start 70: Amazon | Fritz Marine
- Book: The Conscientious Aquarist by Michael S. Paleta (Available on Amazon)
- Book: Freshwater Aquariums for Dummies by Richard E. Strauss (Available on Amazon)
❓ FAQ

How long should I quarantine new fish before adding them to my main tank?
Answer: The standard recommendation is 2 to 4 weeks.
- Justification: Most common parasites (like Ich) and bacterial infections have an incubation period of 10–14 days. A 2-week quarantine allows you to observe the fish for any signs of illness. A 4-week quarantine provides an extra safety margin for slower-developing issues like internal parasites. If the fish shows no symptoms after 14 days, the risk is significantly reduced, but 28 days is the gold standard for peace of mind.
What is the best method for aclimating fish to new water parameters?
Answer: The Drip Aclimation Method is the best method for most situations.
- Justification: Unlike the floating bag method, which primarily adjusts temperature, the drip method allows for a gradual change in pH, hardness (GH/KH), and salinity. This prevents osmotic shock, which can be fatal to sensitive species. It is the only method that safely bridges large gaps in water chemistry.
Can I use a drip aclimation method for sensitive species?
Answer: Yes, and you should.
- Justification: Sensitive species like Discus, Rams, and Shrimp are particularly vulnerable to rapid changes in water chemistry. The drip method is the only safe way to introduce them to a new tank. For these species, we recommend extending the drip time to 2 hours or even longer if the parameter differences are extreme.
Read more about “🐠 Fish Compatibility & Selection: The Ultimate 2026 Guide to a Peaceful Tank”
How do I treat new fish for parasites before introducing them?
Answer: There are two main approaches: Prophylactic Treatment and Observation.
- Prophylactic: Some aquarists treat all new fish with a broad-spectrum medication (like API General Cure or Seachem ParaGuard) for the first 5–7 days of quarantine. This kills external parasites and internal worms before they can spread.
- Observation: Others prefer to observe the fish for 2 weeks and only treat if symptoms appear. This avoids stressing the fish with unnecessary medication.
- Recommendation: For wild-caught fish or sensitive species, we recommend a prophylactic treatment. For hardy, captive-bred fish, observation is often sufficient.
Read more about “Fish Tank Troubleshooting: 12 Expert Fixes for Clear Water & Happy Fish (2026) 🐠”
What are the signs of stress in newly introduced aquarium fish?
Answer: Look for these red flags:
- Gasping at the surface (indicates low oxygen or gill damage).
- Clamped fins (fins held tight against the body).
- Rapid gill movement (indicates respiratory distress).
- Flashing (rubing against objects, a sign of parasites or irritation).
- Lethargy (hiding constantly, not swimming).
- Loss of color (fading or paling).
- Action: If you see these signs, check your water parameters immediately. Perform a partial water change if ammonia or nitrite is detected. If the fish is sick, move it to the quarantine tank.
Read more about “How to Introduce New Fish Without Stress or Disease in 2026 🐠”
Should I add salt to the quarantine tank during aclimation?
Answer: It depends on the species.
- Freshwater Fish: Adding Aquarium Salt (not table salt) can beneficial for freshwater fish in a quarantine tank. It helps reduce osmotic stress and can treat some external parasites. A dose of 1 tablespoon per 5 gallons is common.
- Sensitive Species: Do not add salt to tanks with scaless fish (like Catfish, Loaches, or Shrimp) or plants that are sensitive to salt.
- Marine Fish: Salt is, of course, essential for marine tanks, but the specific gravity must be carefully monitored.
How many new fish can I safely add to an established tank at once?
Answer: One or two at a time, with a gap of 1–2 weeks between additions.
- Justification: Adding too many fish at once creates a sudden spike in the bioload (waste production). This can overwhelm the beneficial bacteria in your filter, leading to an ammonia spike. By adding fish slowly, you allow the bacterial colony to grow and adapt to the new waste load.
Read more about “How to Introduce New Fish to Your Tank Without Stress or Disease 🐟 (2025)”
📚 Reference Links
- Park Lane Jewelry: 5+ Simple and Safe Ways to Aclimate New Fish to Your Tank
- Seachem Laboratories: Drip Aclimation Guide
- API (Aquarium Pharmaceuticals): Fish Aclimation Tips
- Aquarium Co-op: The Importance of Quarantine
- The Spruce Pets: How to Aclimate New Fish
- Fishlore: Quarantine Tank Setup Guide