Support our educational content for free when you purchase through links on our site. Learn more
Dive Deep: Mastering Aquatic Photography & Videography in 2026 🌊
Have you ever wondered how those breathtaking underwater photos and videos are captured—those vibrant coral reefs, elusive seahorses, or swirling schools of fish that seem to dance in crystal-clear water? At Aquarium Music™, we’ve spent years perfecting the art and science of aquatic photography and videography, turning every dive into a symphony of light, color, and motion.
In this comprehensive guide, we’ll take you from the fascinating history of underwater imaging to the latest gear, insider techniques, and ethical tips that ensure your shots don’t just look stunning but also respect the marine environment. Curious about which camera setups deliver pro-level results or how to conquer tricky lighting and movement underwater? Stick around, because we’re revealing all that—and much more.
Did you know? Water absorbs red light within just a few meters, which is why underwater photos often look blue-green without proper lighting. But with the right equipment and know-how, you can restore those fiery hues and capture the ocean’s true palette.
Key Takeaways
- Understanding light behavior underwater is crucial for vibrant, clear images—artificial lighting and filters are your best friends.
- Choosing the right gear matters: from beginner-friendly Olympus TG5 cameras to professional Sony A7 IV setups with Nauticam housings.
- Master buoyancy and patience to capture marine life ethically and beautifully without disturbing the ecosystem.
- Videography requires smooth stabilization and thoughtful editing to create cinematic underwater stories.
- Maintenance and troubleshooting keep your gear safe and your dives worry-free.
Ready to dive in? Let’s explore the ultimate toolkit and techniques that will elevate your aquatic photography and videography to dazzling new depths!
Table of Contents
- ⚡️ Quick Tips and Facts for Aquatic Photography and Videography
- 🌊 Diving Into the History and Evolution of Underwater Imaging
- 📸 Essential Gear for Stunning Aquatic Photography and Videography
- 🎯 Techniques and Tips for Capturing Breathtaking Underwater Shots
- 🎥 Videography Secrets: Creating Cinematic Underwater Videos
- 🐠 Marine Life Photography: Ethical Practices and Patience
- 🌿 Aquascape Photography: Capturing the Beauty of Underwater Gardens
- 🔧 Maintenance and Care for Your Aquatic Photography Equipment
- 💡 Troubleshooting Common Challenges in Aquatic Imaging
- 📚 Recommended Resources and Communities for Underwater Photographers
- 🎉 Conclusion: Dive Into Your Aquatic Photography Adventure!
- 🔗 Recommended Links for Aquatic Photography and Videography
- ❓ Frequently Asked Questions (FAQ) About Aquatic Photography and Videography
- 📖 Reference Links and Further Reading
⚡️ Quick Tips and Facts for Aquatic Photography and Videography
Welcome to the shimmering world of aquatic photography and videography, where every splash tells a story and every bubble holds a secret! At Aquarium Music™, we’ve spent countless hours diving into the depths, capturing the symphony of aquatic life through our lenses. Whether you’re a beginner or a seasoned pro, here are some quick tips and fascinating facts to get you started on your underwater imaging adventure:
Quick Tips to Get You Started ✅
- Start simple: Use a compact waterproof camera like the Olympus TG5 to learn the basics before upgrading. (More on this in Essential Gear)
- Lighting is king: Water absorbs light quickly, especially reds and yellows, so invest in good underwater strobes or video lights to restore vibrant colors.
- Master buoyancy: Good swimming and buoyancy control are essential to steady your shots and avoid disturbing marine life.
- Use wide-angle lenses: They capture expansive scenes and bring you closer to subjects without disturbing them.
- Respect marine life: Ethical photography means no chasing or touching animals—let them come to you naturally.
- Shoot in RAW: Gives you more flexibility for post-processing color correction and exposure adjustments.
Fascinating Facts About Underwater Imaging 🌊
| Fact | Explanation | Source |
|---|---|---|
| Water absorbs red light first | At depths beyond 5 meters, red hues vanish, making photos look blue-green without artificial light | NOAA |
| Saltwater refracts light differently | Objects appear 25% closer and 33% larger underwater, affecting composition | PADI |
| Underwater cameras need special housings | To withstand pressure and prevent leaks, housings are rated by depth | Backscatter |
| Artificial lighting restores true colors | Strobes and video lights bring back reds and yellows lost in natural light | Abyss Ocean World |
Feeling inspired? Hold tight, because we’re just getting started! Dive deeper into the history and gear that make aquatic photography a breathtaking art.
🌊 Diving Into the History and Evolution of Underwater Imaging

Before we get lost in the technicalities, let’s take a quick plunge into the history and evolution of aquatic photography and videography—a journey from bulky contraptions to sleek, high-tech marvels.
The Early Days: From Glass Boxes to Waterproof Housings
- Early 20th century: Underwater photography began with cumbersome glass boxes and primitive housings that limited mobility and image quality.
- 1950s-60s: Innovations like the Nikonos camera revolutionized underwater imaging by offering compact, reliable waterproof cameras designed specifically for divers.
- Modern era: Digital cameras, mirrorless systems, and GoPros with advanced housings have made underwater photography accessible to hobbyists and professionals alike.
Milestones in Underwater Videography
- The rise of action cameras like GoPro HERO series brought underwater videography to the masses, enabling stunning 4K footage in compact packages.
- Professional videographers now use DSLRs and mirrorless cameras with custom housings and external lighting to capture cinematic underwater scenes.
- The advent of drones and ROVs (Remotely Operated Vehicles) has expanded possibilities for aquatic videography beyond human reach.
Why Does This Matter to You?
Understanding this evolution helps you appreciate the gear choices and techniques available today. Plus, it gives you a sneak peek into how technology continues to push the boundaries of what’s possible beneath the waves.
Ready to see what gear can turn your underwater dreams into reality? Let’s explore the essentials next!
📸 Essential Gear for Stunning Aquatic Photography and Videography
Choosing the right gear is like picking the right instrument for a symphony—each piece plays a crucial role in creating harmony. Here’s our expert breakdown of the must-have equipment, complete with ratings to help you decide.
| Gear Category | Design (1-10) | Functionality (1-10) | Durability (1-10) | Ease of Use (1-10) | Overall (1-10) |
|---|---|---|---|---|---|
| Cameras | 8 | 9 | 7 | 8 | 8.0 |
| Housings & Waterproof Cases | 7 | 9 | 9 | 6 | 7.8 |
| Lighting Equipment | 8 | 10 | 8 | 7 | 8.3 |
| Accessories (Lenses, Filters, Stabilizers) | 8 | 8 | 7 | 7 | 7.5 |
1. Cameras: Choosing the Best Underwater Camera Systems
Compact Cameras: Olympus TG5
- Why we love it: Waterproof to 15m without housing, rugged, excellent macro capabilities, and intuitive controls. Perfect for beginners and casual snorkelers.
- Drawbacks: Limited zoom and sensor size compared to DSLRs.
- User story: One of our team members started with the TG5 and captured stunning pygmy seahorse shots on their first dive!
- More info: Olympus TG5 on Amazon
Action Cameras: GoPro HERO11 Black
- Why we love it: Compact, waterproof to 10m without housing, 5.3K video, excellent stabilization, and wide-angle lens. Ideal for dynamic videography and snorkeling.
- Drawbacks: Smaller sensor limits low-light performance.
- User story: We used the HERO11 to film fast-moving reef fish with smooth footage—game changer for videographers.
- More info: GoPro HERO11 Black on Amazon
Mirrorless and DSLR Cameras: Sony A7 IV + Nauticam Housing
- Why we love it: Full-frame sensor, interchangeable lenses, superb image quality, and professional-grade underwater housings like Nauticam provide depth ratings up to 100m.
- Drawbacks: Expensive and bulky; requires experience to operate underwater.
- User story: Our aquascaper used this setup to capture ultra-high-resolution shots of coral reefs and aquatic plants with stunning detail.
- More info: Sony A7 IV on Amazon | Nauticam Housings
2. Housings and Waterproof Cases: Protecting Your Investment
- Material: Most housings are made from aluminum or polycarbonate; aluminum is more durable but heavier.
- Depth rating: Choose a housing rated beyond your maximum dive depth for safety margin.
- Controls: Look for ergonomic buttons and dials that allow full camera control underwater.
- Brands to consider: Nauticam, Ikelite, Sea & Sea, and Aquatica.
- Pro tip: Always test housings in shallow water before deep dives to check for leaks.
3. Lighting Equipment: Mastering Underwater Illumination
| Lighting Type | Brightness (Lumens) | Battery Life | Portability | Best Use Case |
|---|---|---|---|---|
| Strobes (Flash) | 500-1200 | Moderate | Moderate | Still photography |
| Continuous Video Lights | 1000-3000 | Longer | Bulkier | Videography and macro |
| Compact LED Lights | 500-1000 | Long | Very portable | Snorkeling and casual use |
- Brands we recommend: Sea & Sea YS-D3 Strobe, INON Z-330, Bigblue Dive Lights.
- Why lighting matters: Water filters out colors and reduces contrast; lighting restores vibrancy and sharpness.
- Our tip: Use dual strobes for balanced lighting and to reduce backscatter (floating particles illuminated by flash).
4. Accessories: Lenses, Filters, and Stabilizers
- Wide-angle lenses: Bring you closer to large subjects and reduce water distortion.
- Macro lenses: For tiny critters like nudibranchs and seahorses.
- Red filters: Compensate for color loss at depth, especially with video cameras.
- Stabilizers and mounts: Tripods, gimbals, and floating handles help steady your shots.
- Brands: Nauticam optics, SeaLife filters, GoPro mounts.
👉 CHECK PRICE on:
- Olympus TG5: Amazon | Olympus Official
- GoPro HERO11 Black: Amazon | GoPro Official
- Nauticam Housing: Nauticam Official
- Sea & Sea Strobes: Backscatter | Amazon
🎯 Techniques and Tips for Capturing Breathtaking Underwater Shots
Now that you have the gear, let’s talk about how to use it to create stunning images and videos that sing the aquatic symphony.
Understanding Light Behavior Underwater
- Absorption and scattering: Water absorbs longer wavelengths (reds, oranges) first, leaving blues and greens dominant.
- Backscatter: Tiny particles reflect your flash back to the camera, causing spots in images. Use diffusers and position strobes away from the lens to minimize.
- White balance: Set custom white balance or shoot RAW to correct colors during editing.
Composition and Framing in Aquatic Environments
- Get close: Water reduces clarity; the closer you are, the sharper and more colorful your images.
- Use the rule of thirds: Place subjects off-center for dynamic shots.
- Include foreground elements: Coral, plants, or bubbles add depth and interest.
- Shoot upwards: Capture sun rays filtering through water for dramatic effect.
Mastering Focus and Exposure Settings
- Manual focus: Useful for macro shots where autofocus struggles.
- Shutter speed: Use fast shutter speeds (1/125s or faster) to freeze motion.
- Aperture: Wider apertures (f/2.8-f/5.6) for low light, but balance with depth of field needs.
- ISO: Keep ISO low to reduce noise, but increase as needed in darker conditions.
Handling Movement: Subjects and Photographer
- Patience is key: Marine life is unpredictable; wait for the perfect moment.
- Control buoyancy: Maintain neutral buoyancy to avoid stirring sediment or startling animals.
- Use slow, deliberate movements: Sudden moves scare fish away.
- Practice breathing techniques: Calm breathing reduces bubbles and movement.
🎥 Videography Secrets: Creating Cinematic Underwater Videos
Underwater videography is a different beast—fluid, dynamic, and full of life. Here’s how to capture mesmerizing footage.
Choosing the Right Frame Rates and Resolutions
- 4K at 30fps: Standard for crisp, detailed video.
- Slow motion: Shoot at 60fps or higher to slow down fast action in post-production.
- 1080p for casual use: Saves storage and is easier to edit.
Stabilization Techniques for Smooth Footage
- Use gimbals or handheld stabilizers: Reduce shake and jitter.
- GoPro’s HyperSmooth: Built-in electronic stabilization is a lifesaver for action shots.
- Swim steadily: Practice smooth, gliding movements.
Editing Tips for Underwater Video Masterpieces
- Color correction: Restore reds and warm tones lost underwater.
- Cut on action: Keep clips dynamic and engaging.
- Add ambient sound or music: Enhances mood and immersion.
- Use slow fades and dissolves: Mimic the fluidity of water.
🐠 Marine Life Photography: Ethical Practices and Patience
Capturing aquatic creatures is a privilege that comes with responsibility.
- Do not touch or chase animals: Harassment stresses wildlife and is illegal in many places.
- Be patient: Let animals approach you naturally.
- Avoid flash near sensitive species: Some fish and invertebrates are light-sensitive.
- Respect protected areas: Follow local regulations and guidelines.
Our team once spent over an hour patiently photographing a shy octopus, and the resulting shots were worth every second of waiting!
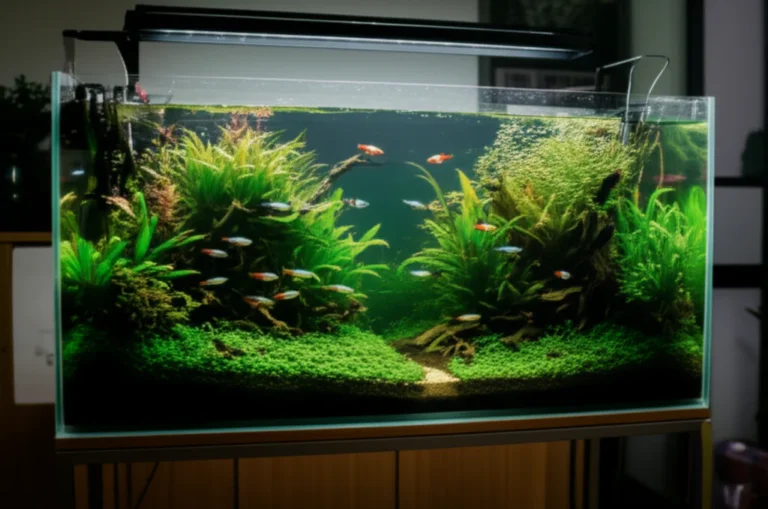
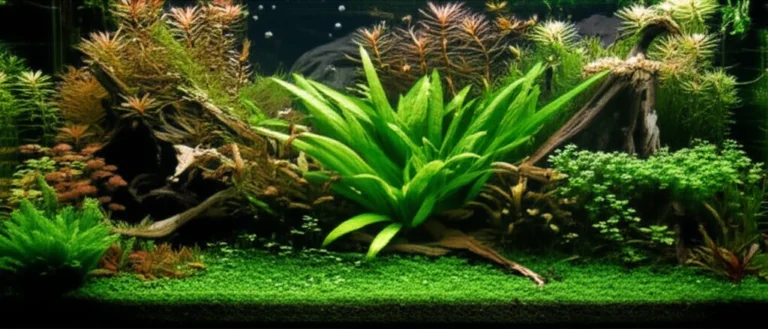
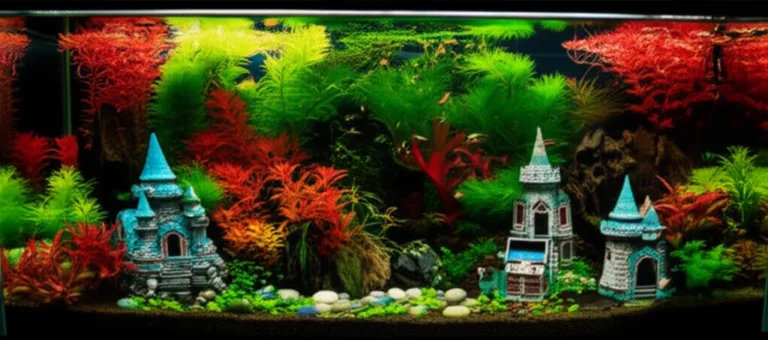
🌿 Aquascape Photography: Capturing the Beauty of Underwater Gardens
Aquascaping is an art form that blends nature and design underwater. Here’s how to photograph these living masterpieces:
- Lighting: Use daylight-spectrum lights to bring out plant colors.
- Angles: Shoot from slightly above or at eye-level with the plants for dramatic effect.
- Focus stacking: Combine multiple shots to get sharpness throughout the scene.
- Post-processing: Enhance contrast and saturation carefully to keep natural look.
Check out our Aquascaping and Aquatic Plants category for inspiration and tips!
🔧 Maintenance and Care for Your Aquatic Photography Equipment
Your gear is your lifeline underwater—treat it well!
- Rinse housings and cameras with fresh water after each dive to remove salt and debris.
- Lubricate O-rings regularly with silicone grease to maintain seals.
- Inspect for cracks or wear before each use.
- Store batteries separately to prevent corrosion.
- Charge batteries fully before dives and carry spares.
We learned the hard way when a tiny sand grain caused a leak—always double-check your seals!
💡 Troubleshooting Common Challenges in Aquatic Imaging
Even the best gear and techniques can hit snags. Here’s how to troubleshoot:
| Problem | Cause | Solution |
|---|---|---|
| Foggy lens | Moisture inside housing | Use desiccant packets; check seals |
| Blurry images | Movement or poor focus | Use faster shutter; steady hands |
| Backscatter spots | Flash reflecting particles | Use diffusers; reposition strobes |
| Color loss | Insufficient lighting or filters | Add lights; use red filters |
| Camera not turning on | Battery drained or water damage | Charge batteries; inspect housing |
📚 Recommended Resources and Communities for Underwater Photographers
Want to learn more and connect with fellow enthusiasts? Check out these gems:
- Backscatter Underwater Video & Photo: Expert gear and advice from a leading retailer. Backscatter.com
- Abyss Ocean World Blog: Inspiring stories and beginner tips. AbyssOceanWorld.com
- PADI Underwater Photography Courses: Professional training for divers. PADI.com
- Facebook Groups: Join communities like “Underwater Photography & Videography” for tips and feedback.
- YouTube Channels: Check out our featured video for a great introduction to underwater photography fundamentals.
If you’re curious about the basics of underwater photography and videography, this YouTube video offers a fantastic overview. It covers how light behaves underwater, the importance of artificial lighting, ethical considerations, and gear options ranging from smartphone cases to professional DSLR housings. Plus, it highlights the magic of split shots or “over-under” photos that capture both above and below the waterline—a true crowd-pleaser!
Ready to take the plunge? Your underwater photography journey awaits, and with the right gear, techniques, and respect for marine life, you’ll be composing your own aquatic symphony in no time. Stay tuned for our conclusion and expert recommendations!
🎉 Conclusion: Dive Into Your Aquatic Photography Adventure!

After exploring the depths of aquatic photography and videography—from the fascinating history and essential gear to expert techniques and ethical considerations—we hope you’re feeling inspired and equipped to start your own underwater imaging journey. Whether you’re wielding a rugged Olympus TG5 for your first seahorse shot or mastering cinematic footage with a Sony A7 IV in a Nauticam housing, the key is to embrace patience, respect marine life, and keep experimenting.
Recap of Key Positives and Challenges
-
Positives:
- Modern gear offers incredible image quality and versatility, from compact cameras to professional rigs.
- Lighting and accessories can dramatically enhance color and clarity underwater.
- Ethical practices ensure the sustainability of marine ecosystems and better photo opportunities.
- Online communities and courses provide invaluable support and learning.
-
Challenges:
- Underwater conditions like low light, backscatter, and movement require skill and specialized equipment.
- Gear maintenance and waterproofing demand diligence to avoid costly damage.
- Mastering buoyancy and composition takes practice and patience.
Our Confident Recommendation
For beginners, the Olympus TG5 paired with a good video light (like the Bigblue Dive Light) is a fantastic starting point—durable, user-friendly, and capable of stunning macro shots. For those ready to level up, the GoPro HERO11 Black offers excellent video capabilities with ease of use, while serious enthusiasts and professionals should consider full-frame mirrorless cameras like the Sony A7 IV with premium housings from Nauticam for ultimate image quality and control.
Remember the words from our friends at Abyss Ocean World: “You can always improve, even with an automatic compact camera.” So, dive in, keep learning, and let the underwater world’s symphony inspire your creativity!
🔗 Recommended Links for Aquatic Photography and Videography
👉 Shop Cameras and Gear:
- Olympus TG5: Amazon | Olympus Official
- GoPro HERO11 Black: Amazon | GoPro Official
- Sony A7 IV: Amazon | Sony Official
- Nauticam Housings: Nauticam Official
- Sea & Sea Strobes: Backscatter | Amazon
- Bigblue Dive Lights: Amazon | Bigblue Official
Recommended Books:
- Underwater Photography Masterclass by Alex Mustard: Amazon
- The Underwater Photographer by Martin Edge: Amazon
- Digital Underwater Photography by Jack and Sue Wilkerson: Amazon
❓ Frequently Asked Questions (FAQ) About Aquatic Photography and Videography

What safety precautions should I take when engaging in underwater photography and videography to protect myself and the aquatic environment?
Safety for you:
- Always dive within your certification limits and never hold your breath while diving.
- Maintain neutral buoyancy to avoid accidental contact with fragile reefs or marine life.
- Use dive buddies and communicate clearly underwater.
- Check your equipment thoroughly before dives to prevent malfunctions.
Protecting the environment:
- Avoid touching or chasing marine animals.
- Do not collect or remove anything from the underwater environment.
- Follow local regulations and protected area rules.
- Use eco-friendly sunscreens and avoid disturbing sediment to keep water clear.
How do I edit and enhance my underwater photos and videos to bring out the best colors and details?
- Shoot in RAW format for photos and log profiles for videos to maximize editing flexibility.
- Use software like Adobe Lightroom or Photoshop for photos; DaVinci Resolve or Adobe Premiere Pro for videos.
- Correct white balance to restore reds and warm tones lost underwater.
- Adjust contrast, sharpness, and saturation carefully to maintain natural look.
- Remove backscatter spots using spot healing tools or video cleanup plugins.
- Consider color grading videos to create mood and consistency.
What are the most important considerations for filming aquatic life in different water conditions?
- Clear tropical water: Use wide-angle lenses and natural light when possible.
- Murky or low visibility: Rely on artificial lighting and get closer to subjects.
- Cold water: Protect gear from condensation; use gloves and thermal protection for yourself.
- Strong currents: Use weighted rigs or anchors to stabilize your position.
How can I improve my underwater photography skills for capturing aquatic life?
- Practice buoyancy control and slow movements to avoid disturbing subjects.
- Study animal behavior to anticipate actions and capture natural moments.
- Experiment with different angles, lighting, and compositions.
- Take courses or workshops, such as those offered by PADI.
- Join online communities for feedback and inspiration.
What are the key techniques for shooting vibrant and clear underwater footage?
- Use external video lights to restore color and contrast.
- Shoot at the highest resolution and frame rate your camera allows.
- Stabilize your camera with gimbals or steady swimming techniques.
- Plan your shots and move slowly to avoid motion blur.
- Use manual focus or continuous autofocus modes optimized for underwater.
How do I capture stunning aquatic life images without disturbing the marine ecosystem?
- Approach slowly and calmly.
- Use longer lenses or zoom to maintain distance.
- Avoid sudden movements or loud noises.
- Respect no-go zones and protected species.
- Use natural hiding spots like coral or rocks to conceal yourself.
What equipment is best for underwater photography and videography?
- For beginners: Compact cameras like Olympus TG5 or action cameras like GoPro HERO11 Black.
- For enthusiasts: Mirrorless cameras like Sony A7 IV with dedicated underwater housings.
- Essential accessories include strobes/video lights, wide-angle and macro lenses, filters, and stabilizers.
- Quality waterproof housings rated for your dive depth.
What are the best cameras for aquatic photography and videography?
- Olympus TG5: Rugged, easy to use, great for macro and casual dives.
- GoPro HERO11 Black: Excellent for video, action shots, and portability.
- Sony A7 IV: Professional full-frame quality with interchangeable lenses and advanced controls.
- SeaLife DC2000: Designed specifically for underwater imaging with great sensor and housing.
How do you capture clear underwater images in low light conditions?
- Use external strobes or continuous video lights to illuminate subjects.
- Increase ISO cautiously to avoid noise.
- Use wider apertures to let in more light.
- Shoot slower shutter speeds only if subjects are still or stabilized.
- Shoot in RAW to recover details in shadows during editing.
What techniques are used to photograph marine life without disturbing it?
- Patience and observation—wait for animals to come to you.
- Use camouflage or natural cover.
- Avoid flash or bright lights near sensitive species.
- Keep a respectful distance and use zoom lenses.
- Minimize bubbles and noise by controlling breathing and movement.
How can I improve my underwater videography skills?
- Practice smooth, controlled movements and use stabilization gear.
- Plan your shots and storyboard sequences.
- Learn color correction and editing techniques specific to underwater footage.
- Experiment with different frame rates and slow-motion effects.
- Study professional underwater videographers and mimic their style.
What equipment is essential for beginner aquatic photographers?
- Waterproof compact camera or action camera with good video capabilities.
- Basic underwater lighting like a compact video light.
- Simple wide-angle or macro lens attachments if possible.
- Durable waterproof housing or case rated for your activity depth.
- Spare batteries and memory cards.
What are the challenges of shooting aquatic life and how to overcome them?
- Low light and color loss: Use strobes and filters; shoot RAW.
- Backscatter: Position lights carefully; use diffusers.
- Movement of subjects and photographer: Practice buoyancy and use stabilization.
- Equipment maintenance: Rinse and inspect gear regularly.
- Environmental conditions: Adapt settings and gear to water clarity, temperature, and currents.
📖 Reference Links and Further Reading
- NOAA Ocean Service: How Light Affects Underwater Photography
- PADI Underwater Photography Courses
- Backscatter Underwater Video & Photo – Backscatter
- Olympus Official Website
- GoPro Official Website
- Nauticam Official Website
- Sea & Sea Official Website
- Bigblue Official Website
- Abyss Ocean World: Starting Underwater Photography and Videography
- Janiki Ink Underwater Photography
- Follow Me Production Underwater Videos
Dive in with confidence, and may your underwater images sing the song of the sea! 🌊📸